DESN 120B — FUNDAMENTALS OF DESIGN II | SPR 2020 | T/TH 4:00–6:45PM | DSN121
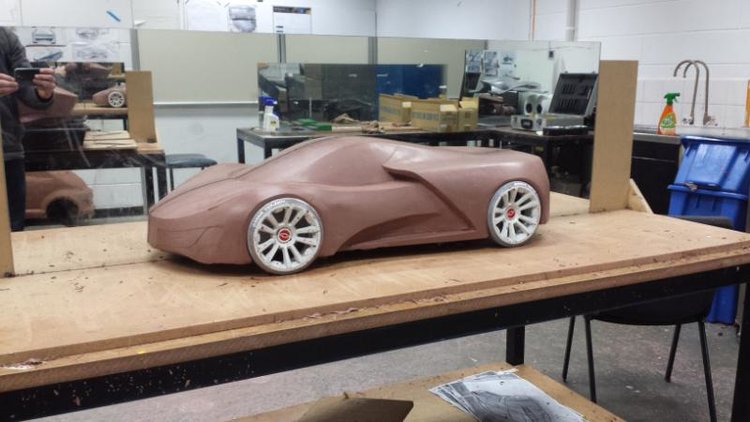
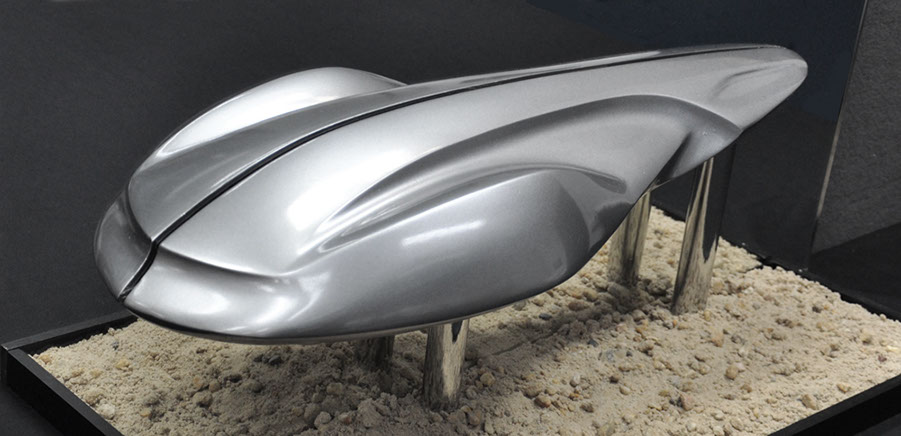
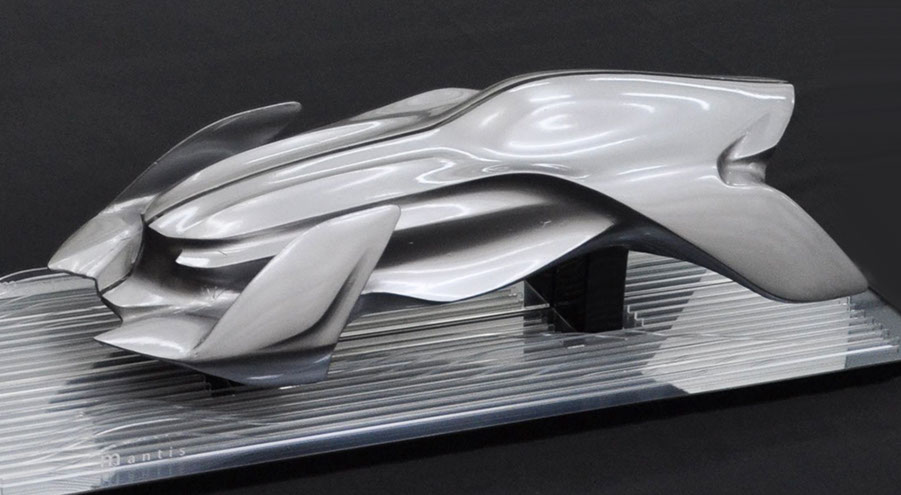
P2B | SPEED FORM: POLYMER CLAY SCULPT
This is Part 2. Do not start here, go to Part 1
GETTING STARTED
2. Following after your SpeedForm Sketchs. Use a roll of 12" minimum trace paper (or wider is fine if you already have it for another class). Produce your SpeedForm sketches on your trace paper. Each student, not per team!
You will be graded on this Exercise based on the Linear inches sketched, 48" = 48 points, 96" = 96 points, out of a possible 100 pts. No extra credit given for going beyond 100", but serious designers should aim for more,
not less, regardless of compensation.
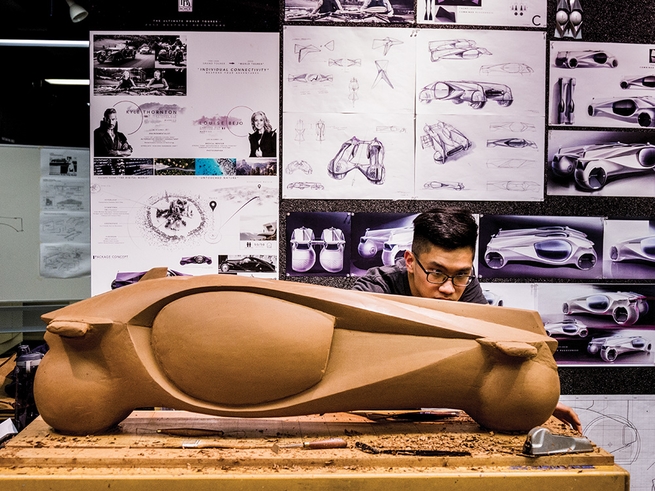
3. Sculpting Materials
- Start with 1lb block of Super Sculpey, Firm or Medium. Should be a Beige earth tone. Available from Michael's, JoAnn Fabrics, and other art supply stores, locally or online, about $17/1lb block. NOT the classic Sculpey, NO Bright Colors
- Clay sculpting tools
- Aluminum Foil. You can use aluminum foil to build a subform
then apply the clay onto that undercarriage, saves a lot of clay! Watch this alien sculpting video for techniques! - Rubbing Alcohol can be used to smooth the surface
4. ID students will focus their SpeedForm sketching on "exterior surface" form. Interiors students will focus their speed form sketching on "interior surfacing" form. Teams should envision their form studies in symbiosis.
DELIVERABLES (See Schedule for due date)
Students must have their form against a mirror to express the form in symmetry. Your integration of the mirror is a measure of the success of your project.
Your "sculpt" should be floating, off the ground plane. There DOES NOT need to be any orientation to the object: no top or bottom, right or left.
12x12x12" is a reasonable overall dimension. You may not exceed 12" in depth, but you could go wider such as up to about 14". Do not go much above 12" tall either.
Verbal presentation to the class (ie. your design studio team, your client, boss, etc.) your design. Remember, focus on expressing key points of your design language and distinctive style. Accompanied by:
Presentation Board. 1 – 18x24” foamcore presentation board of your sketches to accompany your presentation of final form.
3D Object. 1 – 3Dimensional construction in BASSWOOD. Your form should fit within a 12 x 12 x 12" volume and be greater than 50% of that volume.
Object Base. Your object/design will also placed on a 1/2" thick foamcore base, or similarly rigid base with a Acrylic/Plexiglas mirror affixed to one end. Deductions will be severe for using thinner, bending materials, and poorly assembled elements. Mirror and base may be larger than 12", but 12" should be the minimum.
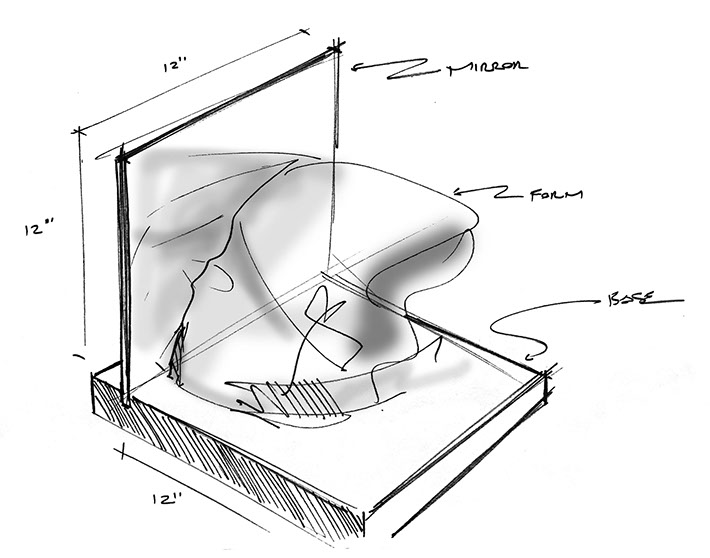
Photo-document your work and submit to Dropbox.com for grading.
Due prior to start of following class.
- 1 - photo of your sketch board, shot square to the frame
- 4 - orthographic photos, front, top, side, back views of your prototype
- 2 - 3/4 perspective view photos of your prototype
Attention to craft in your execution. Execute your final prototype in the most precise manner possible with impeccable attention to EVERY detail. Deductions will be severe for poor craftsmanship.
GRADE CONSIDERATIONS (not limited to the following)
See Rubric at end of this page
- Quality of surface finish
- Formal complexity
- Articulation of details
- Control of creases and edges
- Dynamicism
- Emotive depth
- Control of contact surface/illusion with mirror plane
REFERENCES, INSPIRATION, SUGGESTED READING
Jimmy Hyunh, DESN 320, “form based off of two animals”
Pinterest Searches: SpeedForm Sketching, SpeedForm Interiors, SpeedForm Clay Modeling
Google Search: Speedform sketching, Speedform clay models
Be sure to read and watch carefully.
Getting Started
Using this video you can learn quite a lot. Pause the video, take notes as to what you see.
Super Sculpey Modeling Clay - Creature Bust with Jake Corrick
MATERIALS YOU'LL NEED
You'll notice Jake Corrick's video, he has a very stable base to work into. You don't have to spend a lot of money, but without a sturdy base, it's guaranteed you'll have a difficult time, and likely the finished product will suffer. Your choice.
I have prepared my armature in the same way as Jake has in the video above:
- a sturdy base plate, wood plywood or particle board. I grabbed several scraps and could make about 8 bases from them all for just $1, far cheaper, and sturdier than foamcore. A 1/2” thick piece of plywood or particle board is going to work great. You can also use something thinner like 1/4”, but there is more chance for a little warping which may or may not be noticeable. You can get “cut off” scraps from the very back of Home Depot or Lowes, near their table saw they have a bin of cutoff scraps and you can usually find many good sized pieces they’ll sell for less than a dollar.
- 3/8” threaded pipe flange ($4.98)
- 3/8” threaded pipe, 4” or 6” length. I bought one of each (4”, $2.98; 6” $3.98). Consider the proportions of your form. Is it somewhat tall? Then maybe the 4" pipe would be best. Remember, your form needs to meld to the mirror plane.
- 3/8” threaded pipe T ($2.98)
These are available in the plumbing section of a local hardware store, ACE, Lowe’s, Home Depot, etc. My prices above were from Lowe’s.
ACRYLIC MIRROR
PLEASE DO NOT USE GLASS. IT HAS SHARP EDGES AND IT FRAGILE AND IF IT BREAKS CAN CAUSE SERIOUS CUT INJURY.
From Amazon I’ve found 12x16”, 2 pack for $24.99, or $12.50 each.
Home Depot, Michael’s Art Supply, Lowe’s etc do not seem to carry these anymore.
Art Supply Warehouse used to, but I’m not sure now.
Local small Hobby Supply shops might.
Two local plastics suppliers:
Superior Plastics in Gardena (2124 Rosecrans Ave, 90249), and
OCIP in N. Anaheim. You may need to buy a larger sheet and cut it down, go in on it together with other classmates.
Call around. Go beyond just a google search. Work together to solve the problems you encounter. That’s what we do.
ASSEMBLY
I threaded the three pipe pieces together first so that I can then align the base properly for the T piece
You’ll need to secure the mirror in a stable way to the base you have. Tape is likely not strong enough alone, but maybe glue and tape together might work. I have drilled 3-4 holes and drilled screws through the back. To keep the acrylic from cracking while drilling, be sure to put blue painters tape down then mark your drill holes locations and you can drill. This should minimize any cracking. Use either flush headed screws or countersink screws with countersunk screw washers or “finishing washers”.
GETTING STARTED MODELING
Like our friend in his video, I’ve added some wire. I used a metal coat hanger and trimmed off any excess.
Pack aluminum firmly into/around the wire and T to create a reasonably solid and sturdy base. This saves you a ton of clay, which is relatively expensive, and heavy.
You only want to “block” in a rough estimate of the length, width and depth of your speed form. Do not worry about details.
Once you have a firm, solid, yet rough base you should be ready to start applying your Super Sculpey clay
Polymer Clay
For this assignment use a polymer clay. These clays are less messy than traditional clays, do not dry and do not need to be kiln fired, and they are not as difficult to work as traditional automotive styling clay. You can use any polymer clay, however, I do not have experience using many of them and therefore cannot speak to how well they’ll work. Do not buy the Traditional Sculpey as it is much too spongey and soft for this purpose. I recommend Super Sculpey.
Super Sculpey. 1lb Block - NOT Traditional Sculpey!!
Grey. Be careful. This comes in both “firm” and “medium”. I recommend the Medium only. Firm will be much tougher to work, and harder on your hands. To make it a little easier, try to warm it up somehow. Maybe a hair dryer. But once it’s pressed in and merged together, this will hold edges and articulated cuts cleaner than the beige. $15-19 depending on where you buy it.
Firm - $10.91, Amazon
Medium - $14.58, Amazon
Beige - $11.50, Amazon. This is softer than the gray Medium or Firm
TUTORIALS & HOW-TO GUIDES
PART 2 | CLAY SCULPTING

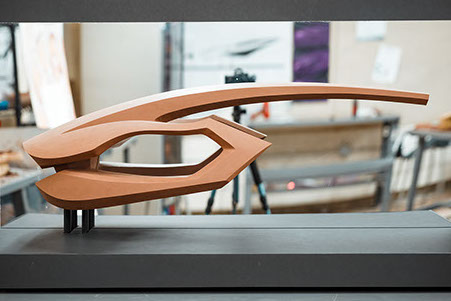
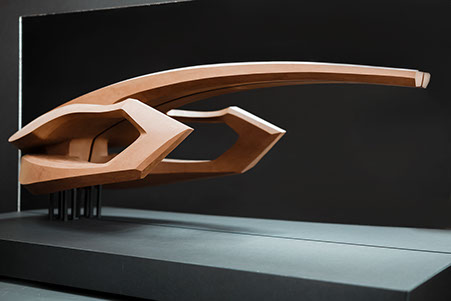
NOTE: DO NOT VINYL WRAP ("PAINT") YOUR SCULPT, LEAVE IT RAW CLAY
Do not decorate your ground plane on this project, it is unnecessary. Focus on the form
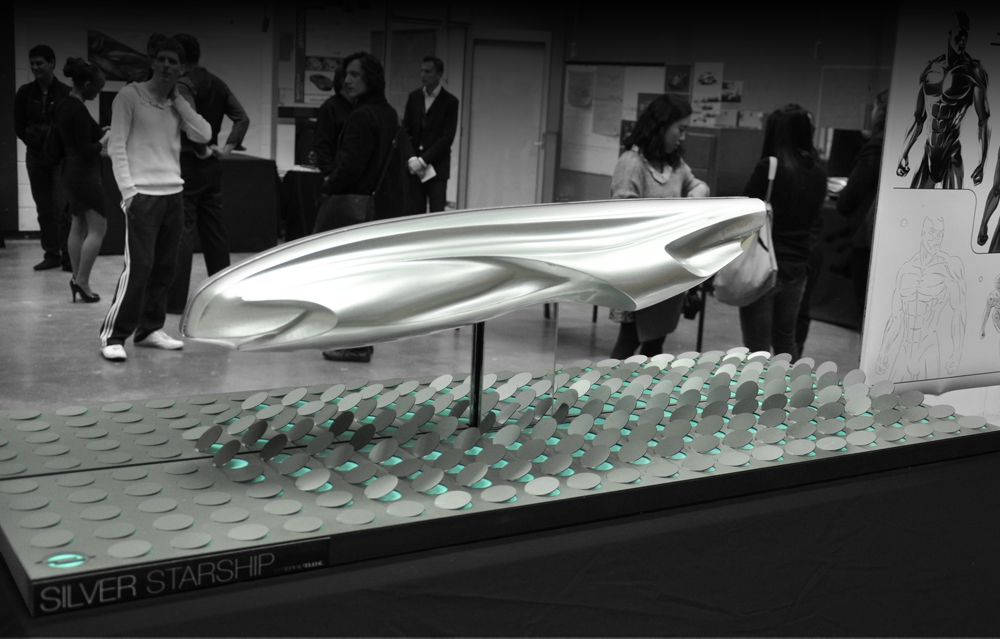
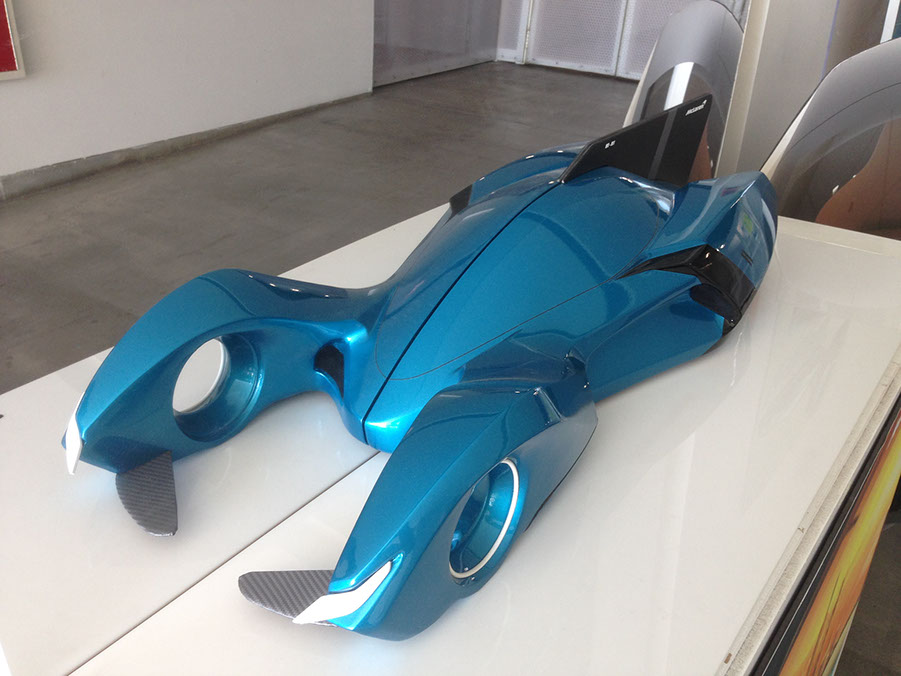
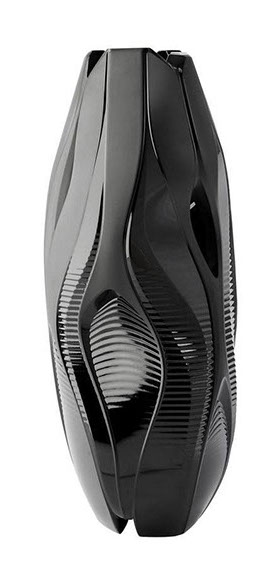
Student design. Art Center of Pasadena, CA

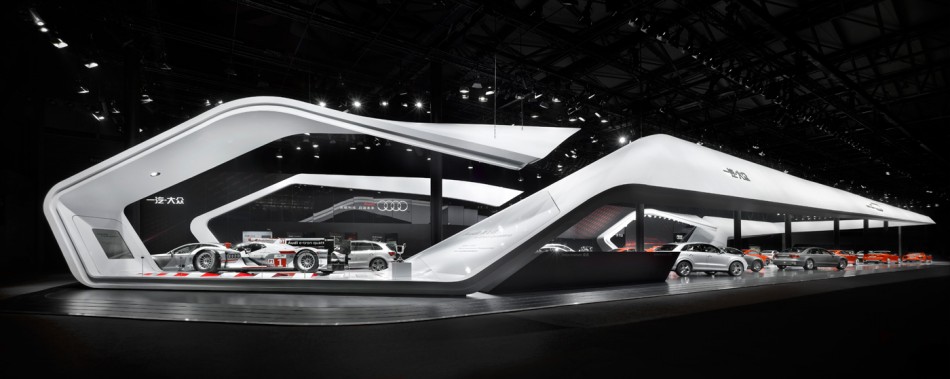
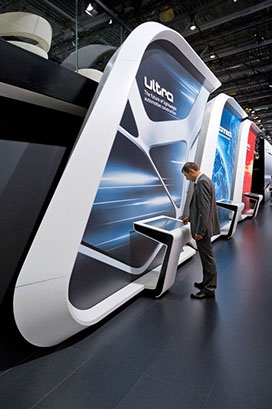
OTHER INDUSTRIES APPLIED
Exhibition Design. The Audi exhibit at the 2013 Shanghai auto show by Schmidhuber Partners

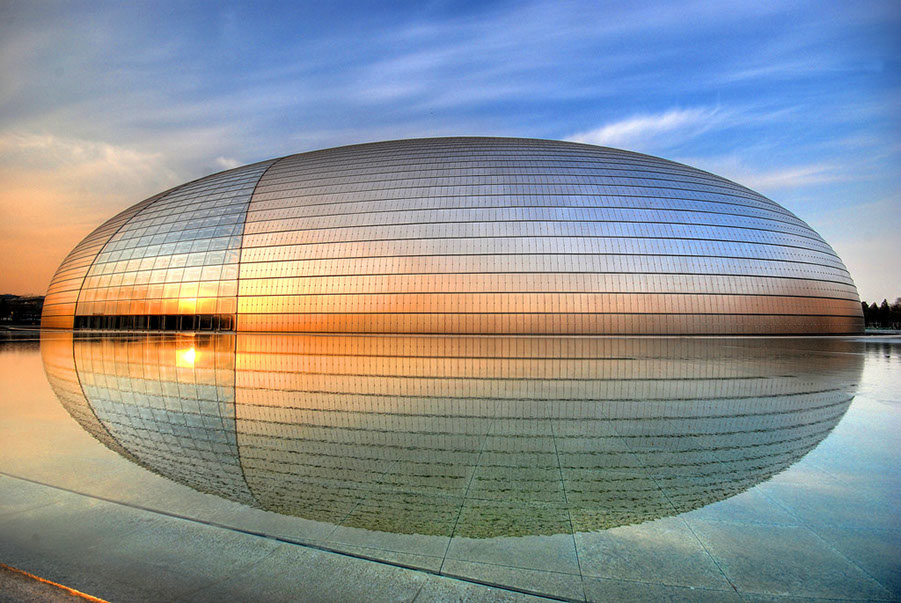
National Centre for the Performing Arts (NCPA), Beijing, China
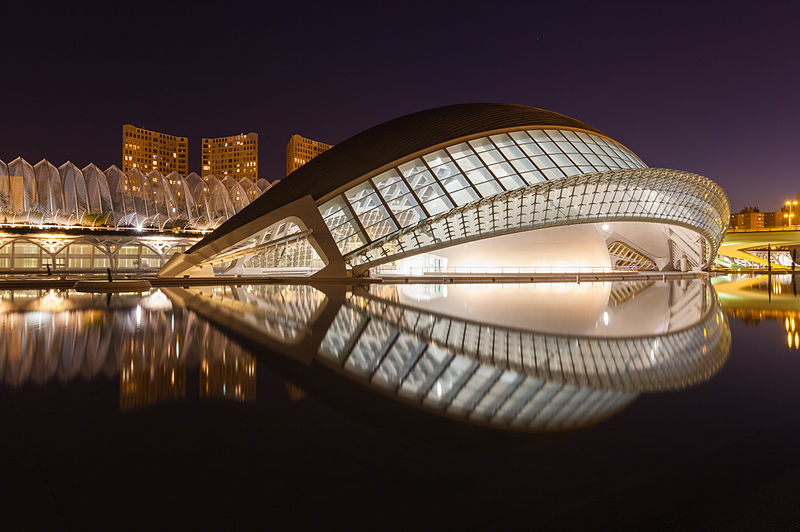
Hemisphere at the City of the Arts and Sciences, Valencia Spain by Santiago Calatrava
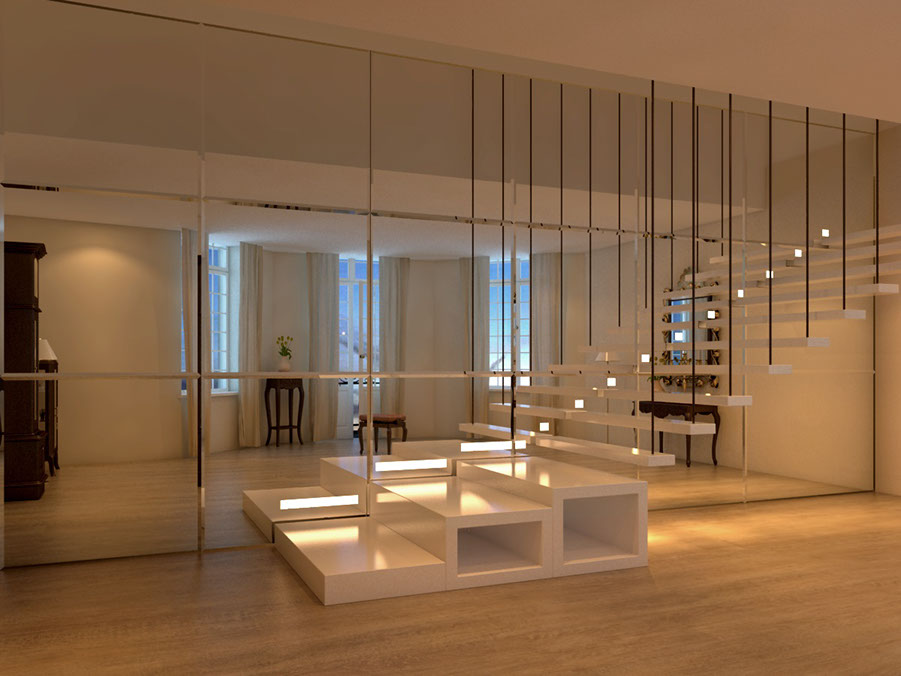
This interior is shown as an example of how a mirrored plane can expand our perception of the space; it is not a "speed form"
Inspiration from the natural landscape, consider this in Landscape, Environmental and Experience Design


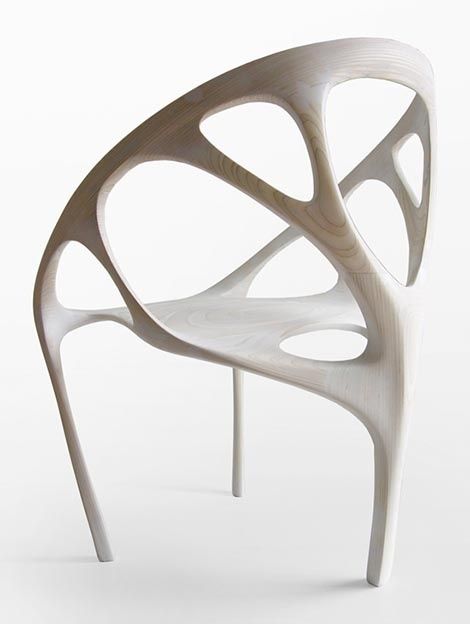
Furniture Design

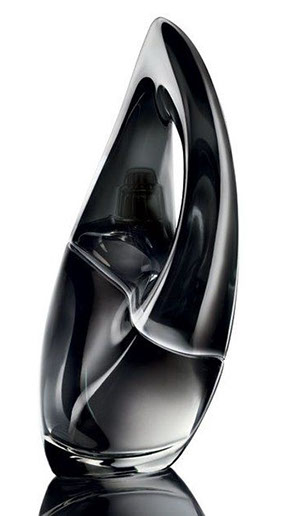
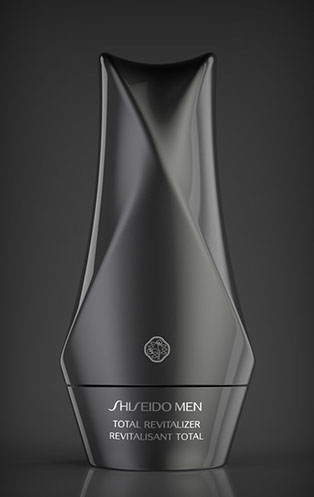
Perfume Bottle Designs
STUDENT LEARNING OBJECTIVES (SLOs)
Upon successful completion of this assignment, students will:
- Gain a deeper understanding of design language through carved form,
- Gain an ability to interpret and translate design language from a specific source to an abstract expression,
- To develop model-building skills and techniques commonly used in Design,
- To develop an understanding of culturally defined standards of quality.
GRADING AND EVALUATION RUBRIC
Student's learning will be developed through the exploration of mixed media, collage, drawing and compositional techniques.
Assessment is determined based on one-on-one feedback, and through student verbal presentation of their concepts and work-product.
The following Rubric will apply in assessment of the student's work product, presentation, and/or process:

^
* Estimate only. See instructor and calendar for specific due dates. Summer Session schedule is more compressed with one week equal to approximately two and half semester weeks.
CSULB | COTA | DEPARTMENT OF DESIGN | BIO

Questions, feedback, suggestions?
Email me with your recommendations.
©2020 Michael LaForte / Studio LaForte, All Rights Reserved. This site and all work shown here is purely for educational purposes only. Where ever possible student work has been used or original works by Michael LaForte.
Works by professionals found online or in publication are used as instructional aids in student understanding and growth and is credited everywhere possible.