DESN 132A—PERSPECTIVE & RENDERING SYSTEMS I | FALL 2020 | T/TH 4:00–6:45PM | ONLINE (AMI)
The following supplies will be needed for this class. We understand art supplies are expensive and do add up. You may use materials that you may already have. Purchase your supplies outside of class time and have them before the class in which they are to be used so that you can gain the most from your lab/studio time.
Many supplies are available for checkout from The Department Resource Room, #123.
Lockers are available for you to store your supplies. Sign up from the Resource Room, #123.
Facilities information such as shop and print lab hours can be found here.
TRADITIONAL DRAWING/RENDERING MEDIA
DRAWING WITH PENCILS
- Graphite - HB lead pencil (a #2 pencil is an HB lead)
- Prismacolor Premier pencils, or comparable brand
- Black PC935
- White PC938
- Indigo Blue 901
- Tuscan Red 937, Optional
- Crimson Lake 925, Optional
- Full spectrum color pencils is NOT required
- Verithin pencils. Black and white, Optional. Useful in specific instances such as sketching on dark paper medium, an open option
DRAWING IN INK
Definitely
- Dual tip Sharpie, black
- Papermate Flair, black
- Blue Ball-point pen, nothing fancy
- Pilot Precise V5 pens are good, Black ink. Comes in Extra Fine (.5mm) and Fine
Optional
- Technical pen set is NOT required. 0.5, .07, 0.9 are good for sketching. .005 and 0.3 are great for fine detail, but are too fine for sketching. Brands: Micron is fine, but are disposable. Copic SPs are nice because you can replace the ink cartridge and tips, which is especially helpful for beginners who often ruin tips due to a "heavy" hand.
RENDERING TOOLS
Markers
We render with markers because they're fast. They're easier to work with than watercolors, which is what was used prior to markers coming around in the '80s. Markers are an expense that with today's digital programs, makes it hard to justify the cost, but, they are also a much more direct tool to teach fundamental concepts to and lay the groundwork before moving into tablet sketching later on.
- Brands are Copic, Prismacolor, AD, Touch, Windsor Newton, Tombow, etc. Different brands enter and exit the market all the time.
- I personally use Copic. They're from Japan, which a couple years ago we ran into some supply issues due to the strikes at the Port of LA/Long Beach. You can see my set of markers here. I like them. I like how they move on the paper. I like the way they flow. The inks are re-chargeable. The tips are replaceable. There's a bunch of accessories you can get, Wide tipped versions, different tip types, even an airbrush system. All great. And I can get them from Art Supply Warehouse. Yes, they're pricey, but ASW does have sales a few times a year, so that's a good time to add to your collection. I like nice things, so... regardless, don't go bankrupty, but you'll need to invest in your tools. I'm not asking you to buy a $185 text book you'll use one semester though. Whatever you come with you'll see I'll do demos with anything you have. I will not demand you buy a specific brand. I don't get paid to promote a brand. That said, get real artist/designer markers. Not junk children's markers. It is an art tool used for RENDERING, not "coloring". You're designers now, we render.
- Prismacolor markers are available at the university art store. They're nice, inexpensive, but are simply disposed when they go dry, or the tips get mashed up, so...no judgment but, just adding more plastic into the waste stream.
- The department provides the Touch brand available for sale, go to the Checkout Room 112A or the Print Lab in our building to inquire about them.
- Different brands use different chemical base. Some are alcohol, some are waterbased, and others are solvent based. They won't work together. So if you buy across brands, make sure you stick within the chemical formula.
- Regardless of brand, get started here.
- Greys 1—10, (odd or even increments ok, but the low end of the spectrum is more critical than then upper when it comes to blending). Warm, Cool, Neutral gray, or French Gray are fine, depends on the brand; do not mix families.
- Colors. You may prefer to collect them as needed
- Blending marker is not needed, optional. I'll show you technique for blending without the blender marker. Be mindful, not all hues will blend. You'll need to work on your color theory understanding. A colorless blender can be used for an expressive treatment.
Whites. To add white glare highlights you'll need a little extra help. The white Prismacolor Premier pencil, plus...
- For the most control, a Paint brush. Ultra Fine 000, long bristle to be used with white gouache, maybe you already have for your 120A class, or Dr. P.h. Martin’s Bleed Proof white, best.
- Opaque white-out paint pen. Convenient to carry, but considerably more difficult to apply with control. A good "quick and dirty" tool for strong highlights. Copic makes an excellent one. I carry around a Pentel Presto! Pocket Correction Pen. You want one where the paint will sit on top of your marker rendering work, some soak into the paper too much and they don't work and will be frustrating. Sometimes you just have to buy a few different types and experiment with what's giving you a good result
- Pencil sharpener. Get a simple Bronze or Aluminum one. They're small and never need batteries and always work. Plastic ones are usually terrible. Battery powered electric sharpeners are NOT recommended either as the batteries always seem to be drained and they don't have great power and don't work great. They're also bulky and heavier than a small sharpener. Just get a good solid hand sharpener.
ERASERS
- Kneaded Eraser—the best eraser for working on trace. Seriously the best thing since sliced bread. Get one.
- Staedtler Mars White Plastic—recommended. It's firm but doesn't leave discoloration in the paper. Other types like Magic Rub block or Pink Pearl ok as well, but I find the Pink Pearls can leave a pink residue which can be annoying.
- Portable electric erasers are ok, but not highly recommended for the same reasons as with electric sharpeners.
PAPERS
- Trace paper, white. 18” wide Roll OR sheets 14x17 sheets.
- Marker Paper. 14 x 17”. 2 pads of 50 sheets, (Bienfang Graphics 360 rag recommended, but other brands are fine. Some are more expensive than others, some are more thick than others. Bienfang is thin enough I can usually trace through it without having to run to a light table)
- Bond Paper. 14 x 17”. 2 Pads of 50 sheets
- Optional/Recommended. 9 x 12” Bogus Recycled Rough Sketch pad,
or similar medium toned sketching pad. Optional. Available at
Art Supply Warehouse.
DRAFTING TOOLS
We RARELY need these any more, but some people may prefer to have them.
- Triangles. We're not going to be doing any "drafting" in this class, but 30/60° and 45° are standards, even if we are all digital in the workplace.
I like having a large or medium set and small ones. An adjustable angle triangle can often be useful, but is not required. - Some kind of straight-edge, 18-24” is nice. The triangles (above) work fine too.
- Tape - Drafting dots are recommended over drafting tape. Tape is ok, but
dots will save you time and energy and simply work better. Buy Alvin, Kohinoor, or Staedtler brands only. Do not purchase the cheap brand
at campus store, trust me. - T-square, or Mayline-type bar drafting table setup is nice for home, but a hassle to carry, just bring a T-square.
- Architectural scale. Again we aren't doing technical drafting, but it's useful to start understanding what it means when we draw or print drawings at specific scales, often in metric and/or engineering scales today. Everyone needs a scale at their desk.
- French curve set, aka Sweep curves, especially helpful for beginners who do not have a good hand for clean arcs, helps to cleanup final work.
- Erasing shield - an old school and sometimes super helpful little tool.
- X-acto Knife, Scissors, or paper cutter appropriate for cutting your trace paper into sheets.
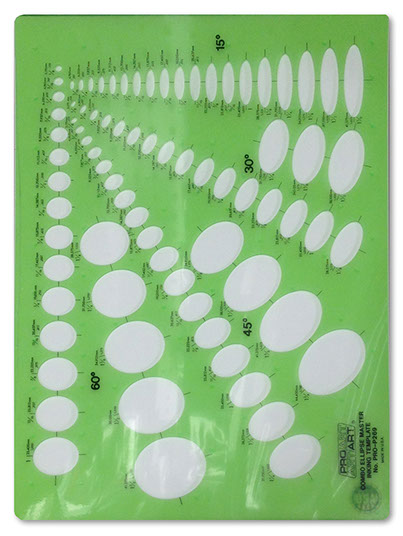
ELLIPSE GUIDES - OPTIONAL, BUT HELPFUL
- In the old days every designer would have an amazing range, from small to large at 5 degree increments. With today's sketching programs and apps, it's difficult to justify the expense, BUT they really are helpful, and the more and longer you sketch, the more you'll understand why and appreciate them. Still, tough to justify. But, as a LEARNING tool, the minimum of one with a range of 15, 30, 45, and 60 degree ellipses like the green one below is good.
- Circle (90º ellipse) templates or a Drafting compass, or both are also useful. For example, sketching a water bottle top view, grab the circle template, you don't have to struggle with sketching perfect circles. Be smart about your time and energy.
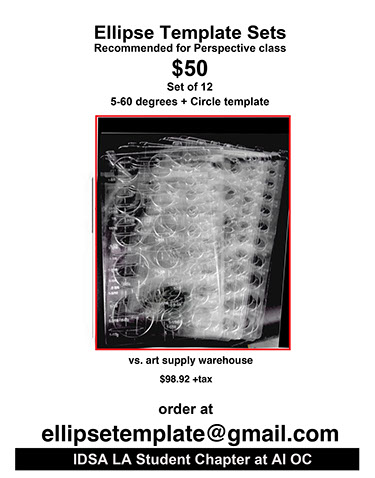
- If you're serious about learning to draw well, appreciate the traditional craft of hand drawing, you may want to consider buying a comprehensive set of ellipse templates. Get them used online. Whatever saves you $$$. Students at AI-OC (below left image) used to make them and sell them. Try their email and see ellipsetemplate@gmail.com.
 ellipsetemplate@gmail.comellipsetemplate@gmail.com
OTHER SUPPLIES - IMPORTANT
- Art-Bin, Tackle/Tool box, or similar supply carrier for transporting supplies.
- Portfolio Case. They come in a range of price points. Doesn't need to be fancy, but it should be rigid, to keep your projects clean and flat, and dry on those rare days when it's raining and you have to carry your work across campus. If you don't take care of your work, it shows you're not ready to be in this major. Period. One of the easiest places for me to drop you a letter grade is when your sheets look krinkled and water damaged.
TUTORIALS & HOW-TO GUIDES
* Estimate only. See instructor and calendar for specific due dates. Summer Session schedule is more compressed with one week equal to approximately two and half semester weeks.
CSULB | COTA | DEPARTMENT OF DESIGN | BIO

Questions, feedback, suggestions?
Email me with your recommendations.
©2020 Michael LaForte / Studio LaForte, All Rights Reserved. This site and all work shown here is purely for educational purposes only. Where ever possible student work has been used or original works by Michael LaForte.
Works by professionals found online or in publication are used as instructional aids in student understanding and growth and is credited everywhere possible.