DESN 132A—PERSPECTIVE & RENDERING SYSTEMS I | FALL 2020 | T/TH 4:00–6:45PM | ONLINE (AMI)
All assignments depend on strong application of the following:
Base Construction System. 1pt-, 2-pt grid, or 3-pt Perspective, or 3D Modeling Software for Base underlay.
Details. Articulation of and Scale via the human figure.
Rendering Values. Various techniques include cross hatching in graphite, pen, and/or in marker,
rendering with color pencils, rendering with marker and pencils.
NOTE:
While each assignment will have a primary representation focus, most if not all, will include some combination of the following stages and/or drawing types. It is the student's responsibility to become well versed in these types, and when/where they are used in the design process:
Exploratory and Analysis Sketching.
By drawing, you are thinking about the problem and considering solutions while not jumping to first-thought solutions, which may be strong, or may be lame, but drawing helps to discover what you know, and don't know and can do more research and development of.
P3 | AR / VR EYEWEAR
3 weeks
PROJECT OVERVIEW
Students are challenged with designing using 2-pt perspective, orthographic drawings, and simple prototyping. This project will also introduce students to the use of Informational Graphics (info-graphics) to illustrate and describe their product concept in greater detail.
Students will design an AR or VR eyewear for a specific purpose, user, and specific client/brand.
AR, Augmented Reality, is a layer applied to the vision over the world in front of us in order to provide the wearer additional environmental feedback in the viewer's window of sight.
VR, Virtual Reality, is a fully immersive visual experience where the vision is fully occupied by a screen which ultimately fools the brain into believing into the artificial environments and experiences.
Students WILL need to find inspiration for their design language by looking at historic references for styling cues, notably positioning their design within the dialectics of German vs Italian Design schools. See Dieter Rams for Braun, Jony Ive for Apple vs Michael Graves for Alessi, Smeg or Olivetti, brands which typify austerity vs levity.
Use your understanding of the basic primitive or formal volumes and corresponding rules that have been established to serve as a principal foundation in design drawing and sketching, ie. ellipse logic, sphericals, triangulation, etc..
Students will have no time to waste on this project. There is a lot to do.
PROCESS / METHODOLOGY
Week 1: Research and Base drawing systems
- Orthographic system, traditional/classical organization
- 2-pt Perspective system construction
- Go to a place like BestBuy and see in person current VR designs, don't just use image searching.
Week 2: Add details including materiality, textures, and simple shadow casting (perspective). Graphite Pencil rendering study, Marker vignette (small areas) studies. As design develops, begin Exploded Assembly drawings. You should be starting rendering studies by this week.
Week 3: Render with Markers. The sooner you work these into your design studies, the better. No need to wait til week 3.
RESEARCH, FORM GENERATION & COMPOSITION
Research and create a "collage board". You do not need to paste-up on foam-core, but you should print photos for reference, OR create a PINTEREST board. Obtain photos of luxurious and/or stylish restaurants and bars, hotel cocktail bars, etc. to use as a visual reference in your own design.
Establish a specific user group for your AR/VR design, such as cyclists, kayakers, HUD for vehicles, HUD for fighter pilots, VR Headgear for SONY, Samsung, or Oculus, etc. Be specific! Who are you developing for? Lock it down.
You may find inspiration from a well known work of literature or science-fiction writing and propose your design for it; entertainment design. If it is a well known film such as Star Wars, Aliens, etc. be sure to make it your own unique design for a new sequel to the franchise, not merely a copy of what was already created.
You are being empowered to make critical thinking choices. Is your eyewear AR or VR? Know the difference. What are the advantages or disadvantages of each system? What is the specific user group you are designing for? Be specific. Be sure your drawing can validate your design choices.
RENDERING
Using Color along with Grey markers render your design(s) and
Include finishing details with Prismacolor pencils, paint for glare, etc.
Your design space MUST have at least 3 different and distinct materials/ textures and details. Plastic, rubber, glass/lens, etc. Buttons for on/off/zoom, etc...
Your design MUST have materials with contrasting qualities/attributes, and/or materiality changes:
Matte vs Polished/Glossy/Chrome surfaces;
Opaque vs Transparent surfaces;
Rough surfaces (Remember, rough will affect the profile of the surface) vs Smooth surfaces.
Develop AT LEAST 20 preliminary studies using graphite or similar media to explore textures, composition of your design, etc. Do not be limited by having only one idea. You will be expected to make design changes along the way.
DELIVERABLES
3 (min) - 11x17" sheets
1 - Client/Brand Understand, Mood, Inspiration, etc. panel.
1 - Sheet of Process Studies.
1 - Sheet of Final Design.
Include Material Annotations.
Include Info Graphics which describe features/functions.
1 - Model Prototype - INEXPENSIVE materials/process, no CAD model/prototypes
Include name, class name, instructor's name, Brand, AND a CONCEPT NAME
A title for your concept design may be fictitious such as XenLenX, etc. Be creative yet concise; long names or overly complex names are difficult to brand, and/or should be broken into a name and tagline.
All three panels should feel like a unified presentation strategy.
REFERENCES AND INSPIRATION
Applications
Fighter Pilot helmets (AR)
HUDs (AR) - Head's Up Displays, may be in helmets or in automotive windshield applications
Everysight (AR) - cycling, glasses
Future fashion
Ski/Snowboard Goggles (AR) - Brands like Smith, Oakley, others
Brands inventing the tech
Occulus (VR)
Google (VR and AR, Glass)
Samsung (VR)
Microsoft Halolens (AR)
HTC (VR)
Drawing/Sketching Technique
into SPLINE - blueline sketch, ortho and perspective.
ON sketchTV Shinhan Touch - blue marker rendering
Spencer Nugent/Sketch-a-day VR headwear on iPad with Procreate
Spencer Nugent/Sketch-a-day Sunglasses - traditional sketch media
Sunglass sketch - very low, almost orthographic view, but still perspective
Sunglass sketch using Sketchbook Pro - tough to tell from the speed of the video
Notice that in each case, there are only a few rules that one must adhere to which guide, control, and develop the sketch.
- proportions in the perspective system, i.e. accurate use of foreshortening and convergence.
- understanding ellipse logic.
- line weights. variation and confident.
- inclusion of specific details including parting/separation edges, AND clear understanding of the ergonomics that this object is to be worn on a human head.
- contrast, contrast, contrast in your renderings, leaving whites for glare, base value/color, and core shade/shadow depth.
Articles
Google and the Resurgence of Italian Design. Medium. Braun is to Apple what Olivetti is to Google.
EXAMPLES, GETTING STARTED
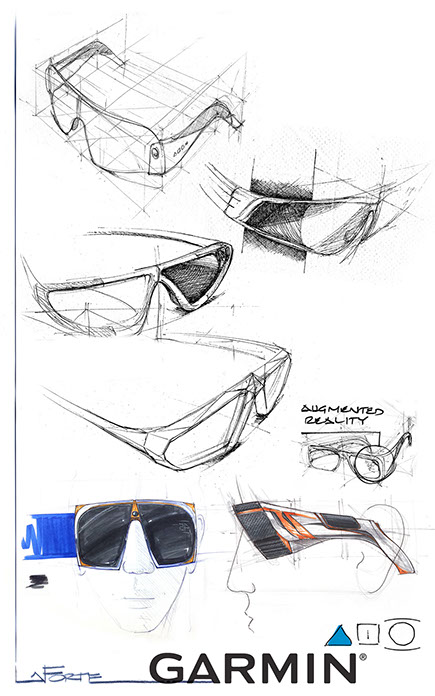
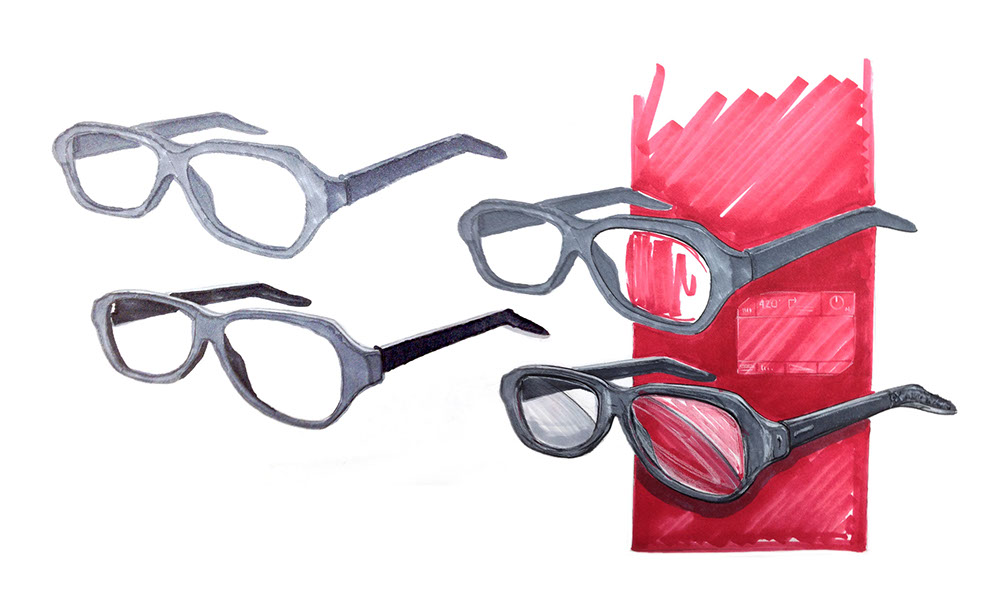
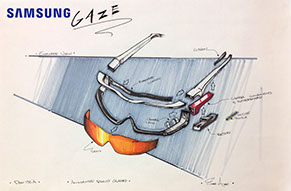
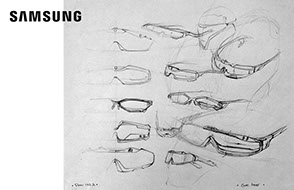
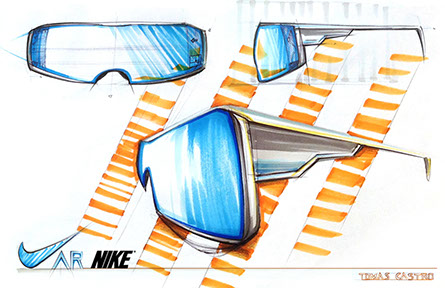
The studies below are a collection of my own sketches which draw upon some familiar shapes and styles, while working out some anatomy relationships as well as direction. Bronze lens study in bottom left is a student's "shapes" with my rendering applied to demonstrate glare and tinting effects.
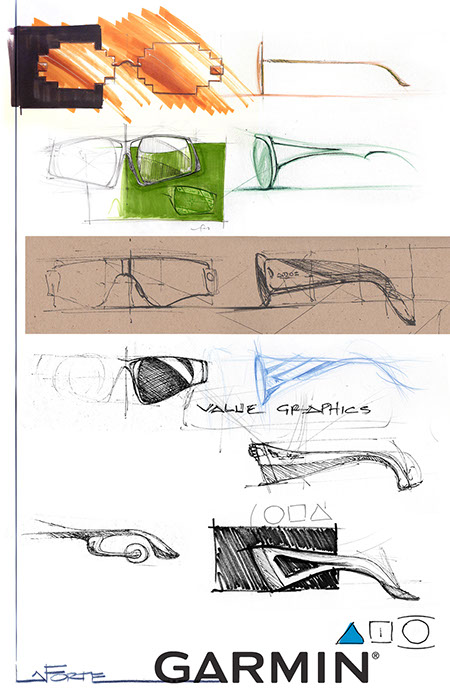
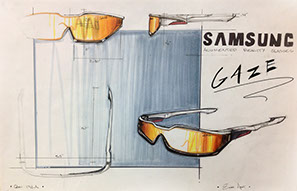
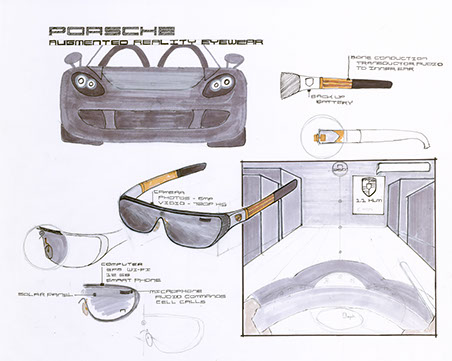
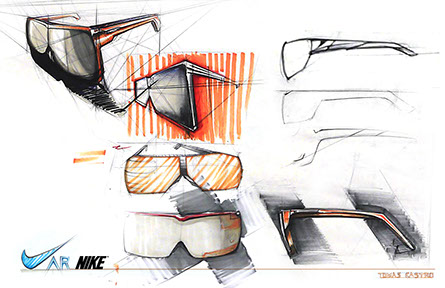
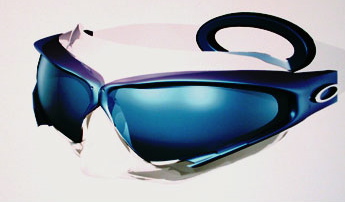 We're not computers. We're humans and sketching and rendering are the fastest ways to explore an abundance of ideas quickly. You do not need to try to compete with 3D model rendering from SolidWorks Keyshot, StudioMax, Alias, VRay, etc.—other classes.Develop contrast in your renderings, don't be afraid to use more black and include backgrounds that in which to layer into. Top left below is the student's "best" effort. The bottom right is after working with it a little more.
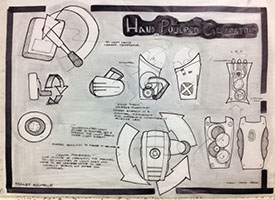
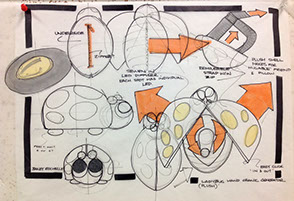
STUDENT WORK EXAMPLES

STUDENT LEARNING OBJECTIVES (SLOs)
- To gain strong understanding of fundamental forms,
- To gain understanding of shadow casting logic,
- To gain understanding of mirror reflection logic,
- To develop gray scale marker rendering skills and techniques,
- To further refine line quality and line weights,
- To refine presentation and composition skills.
GRADING AND EVALUATION RUBRIC
The following Rubric will apply in assessment of the student's work product, presentation, and/or process:

CHECK IT OUT!
TUTORIALS & HOW-TO GUIDES
^
* Estimate only. See instructor and calendar for specific due dates. Summer Session schedule is more compressed with one week equal to approximately two and half semester weeks.
CSULB | COTA | DEPARTMENT OF DESIGN | BIO

Questions, feedback, suggestions?
Email me with your recommendations.
©2020 Michael LaForte / Studio LaForte, All Rights Reserved. This site and all work shown here is purely for educational purposes only. Where ever possible student work has been used or original works by Michael LaForte.
Works by professionals found online or in publication are used as instructional aids in student understanding and growth and is credited everywhere possible.