1-PT PERSPECTIVE GRID CONSTRUCTION
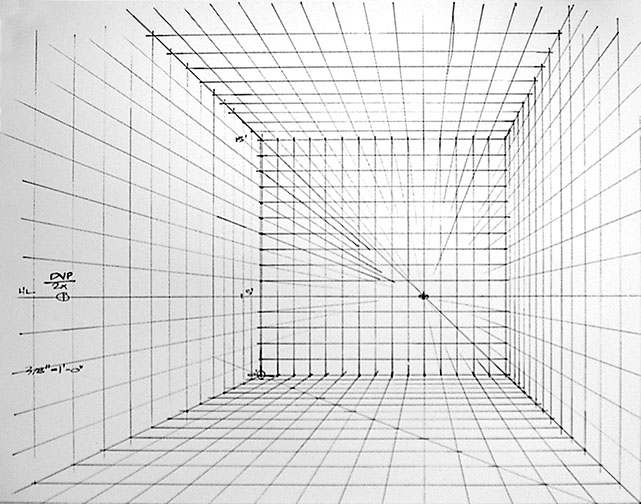
The 1-pt Perspective Grid is a great way to show three walls at the same time in an interior space. It's also a little more direct in some ways than building a
2-pt Perspective. The grid below uses a 5' Horizon Line (HL), or Eye Level.
TUTORIALS & HOW-TO GUIDES
This video will help you with the setup.
METHOD
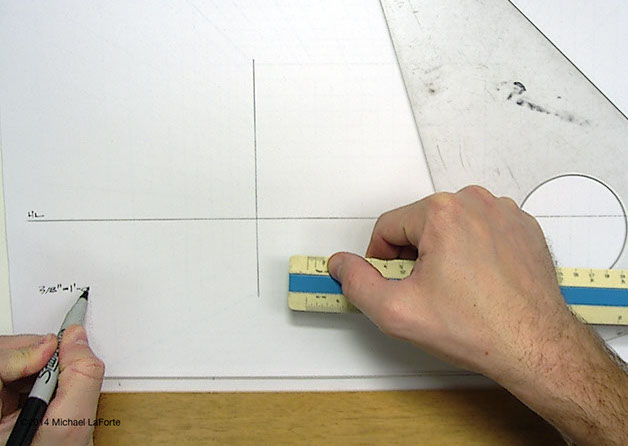
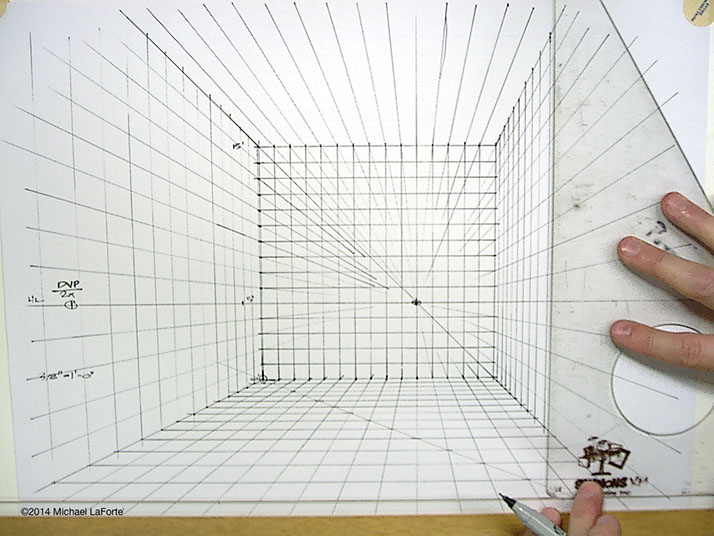
It is easiest to control your work using a T-Square and Triangles. Once you learn the system and practice, you can do an excellent job simply sketching.
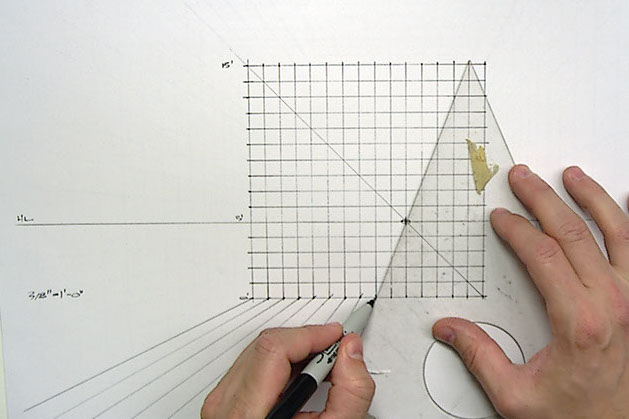
Get started by drawing a Horizontal Line, the Horizon Line (HL) on your paper and then a perpendicular vertical line.
Using an appropriate scale, create even marks vertically, starting with 5 down from the HL, for a 5' eye level. Add more marks vertically corresponding to the total height of your space. If you have a 12' Ceiling Height, you'll have 5 marks below the HL and another 7 above the HL.

Use the same unit of increments across the horizontal Base Line according to the width of the space you intend to design, ie. if your space is 20' wide, then mark off 20 units.
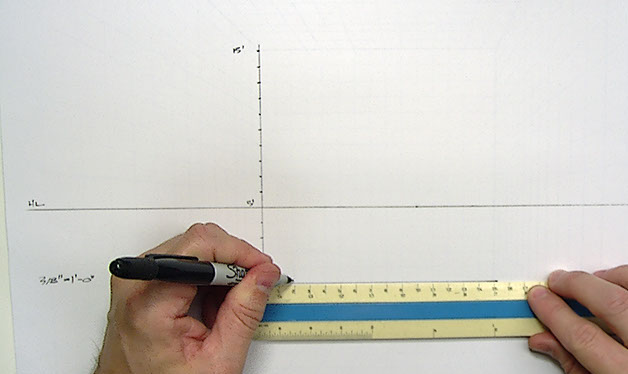
With your horizontal bar or T-square and triangle, draw horizontal and vertical lines at each of those marks, forming a good grid.
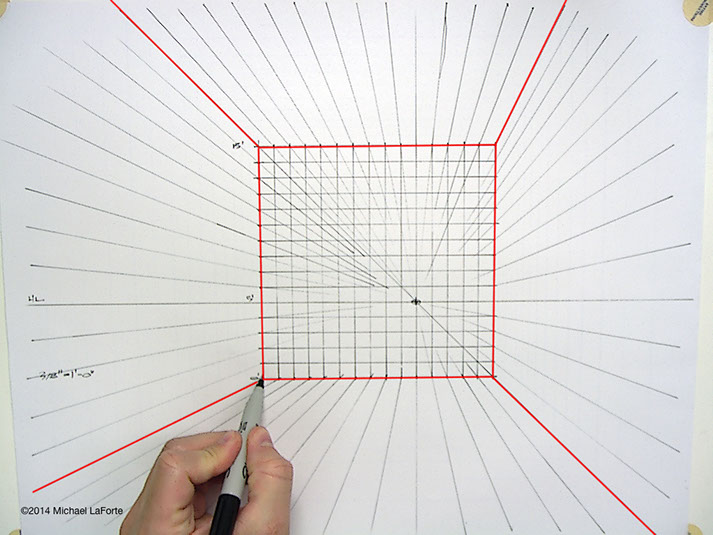
From the Vanishing Point (VP), extend lines outward around the perimeter of the grid you've created. These lines represent "parallel" edges and Converge to the VP. They articulate the floor, ceiling, and left and right walls.
Here, the corners of the room have been highlighted in red.
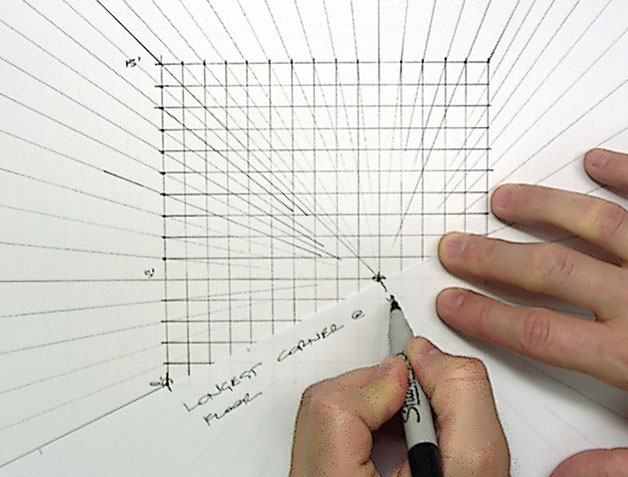
To build a grid which compensates for "Foreshortening" we now need a Diagonal Vanishing Point (DVP). To get this, find the distance between the
VP and the furthest corner of the room at the floor. This can be measured
with your scale or the edge of a sheet of paper will work fine as well, just
make marks. We'll call the length of this line X.
X
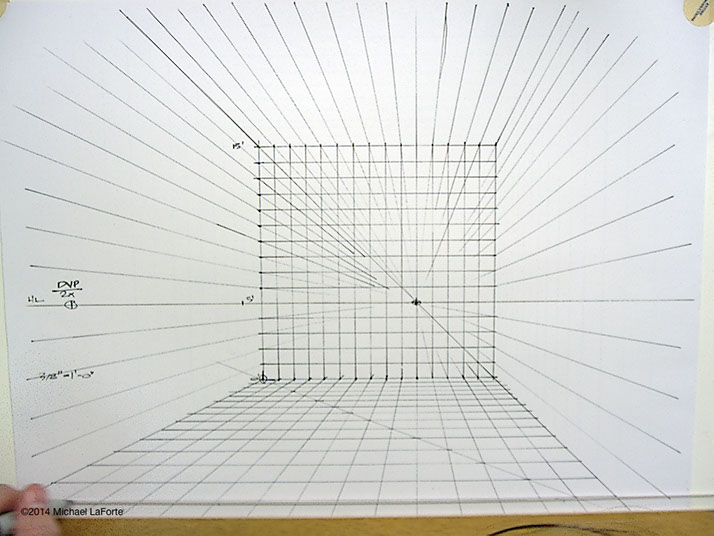
Take the length X up to the HL. You can use your ruler, scale, or the marked paper, just bring the X length off the VP in the same direction as indicated below and double this dimension, ie. 2X, and mark this length on the HL.
This is called the Diagonal Vanishing Point (DVP).
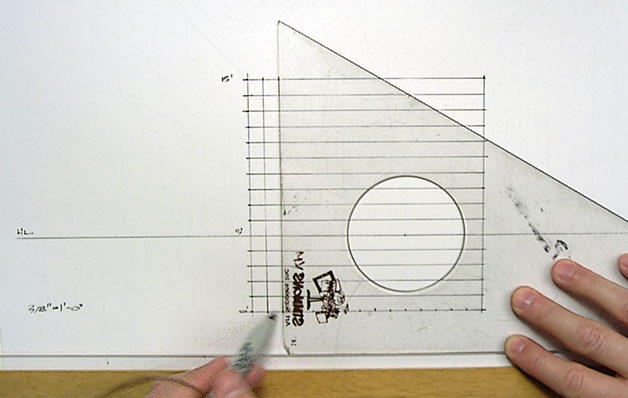
From the DVP draw a diagonal line through the corresponding corner as shown below in blue. Where this diagonal line crosses the "converging" lines on the ground or floor plane, indicated with red dots below, you now draw horizontal lines.

Your ground plane will look something like this. Each of these trapezoidal shapes are what a square actually looks like to our eye when drawn on a flat glass plane.
Where the horizontal lines meet the edges of the room, carry the lines up vertically, on both the left and right walls.
Lastly, carry the lines across the ceiling plane. If done accurately, they should be very close to intersecting perfectly on both sides.
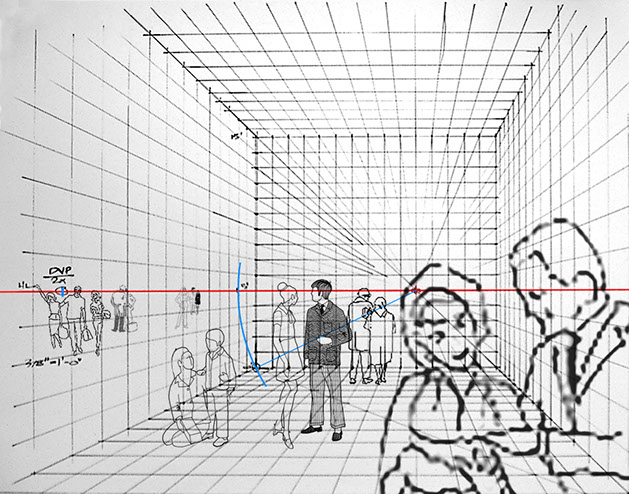
You now have a system to control the proportions and placement of your objects. This grid may represent any scale you find convenient. Each grid unit may represent 1', or half a foot, 6", or 2 feet, or 1 meter, or 1 cm. The scale is up to you and what is working for your particular drawing needs.
The examples below were all created using a one point system such as this. It will be important to know the approximate heights of chairs, tables, door ways, etc. You can measure these from around you home or office to get a good idea, then set them into this system.
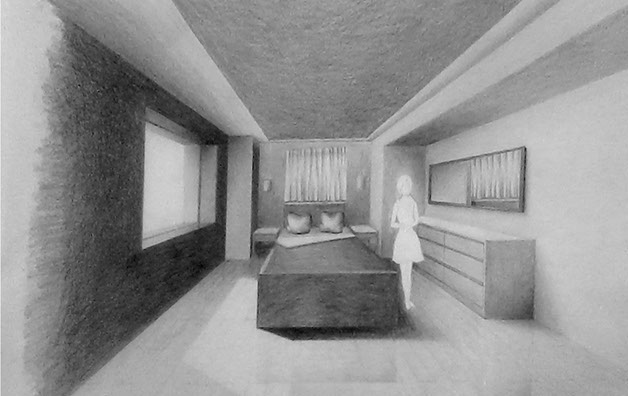
Notice the people or "entourage" have been set into the space where the average eye level is aligned through the HL. Notice that as the figures get smaller, they appear farther away, but the HL goes through their eyes. Some people are a little taller or shorter than 5', so it's ok if some heads are higher or lower, but keep the average. Notice a child will be shorter than the HL, likewise people sitting in this scene would have a head height of approximately 3'.
Strong understanding and adherence to the correct placement of your figures is critical for creating believable spaces.
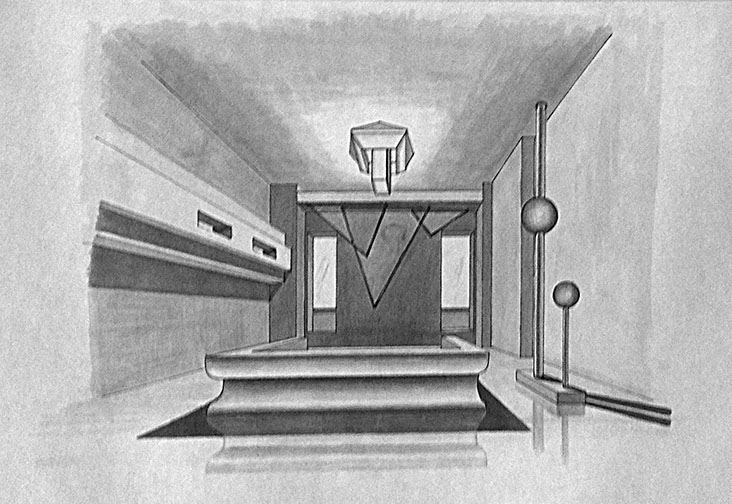
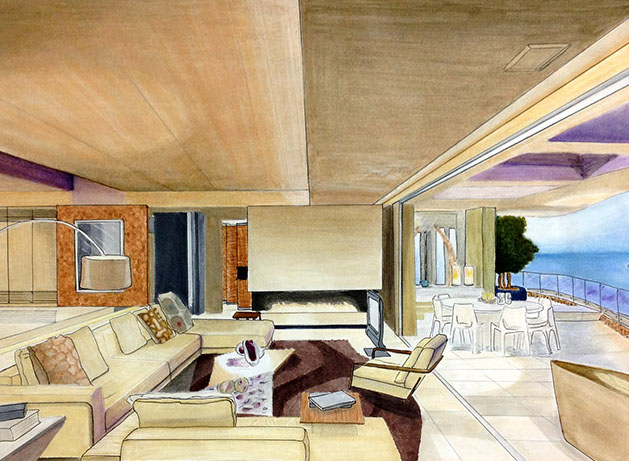
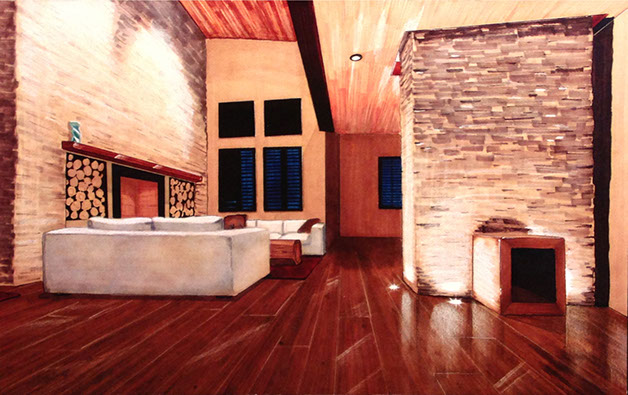
RENDERED EXAMPLES
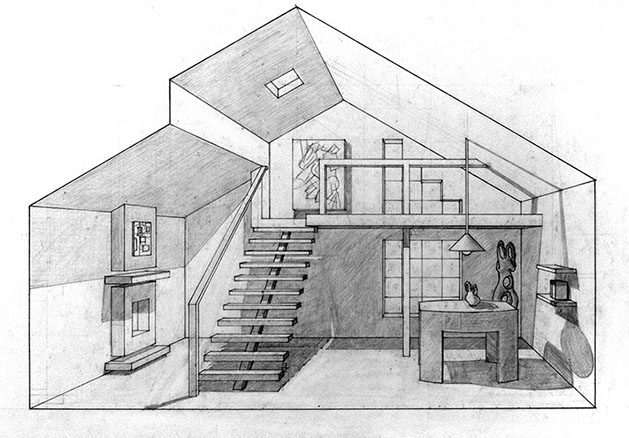
Jesse Minott. Ink and graphite on bond paper.
Tam Tran
Socheata Kong
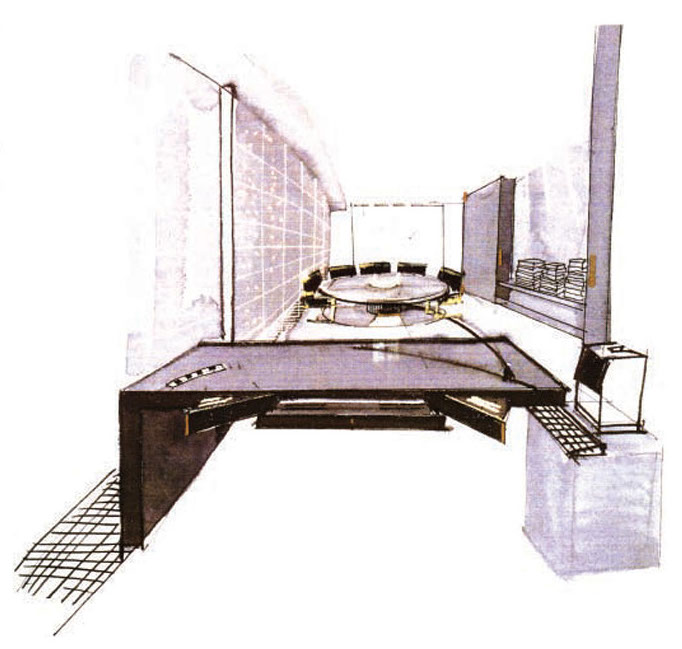
A loose office space sketch from Interior Design Illustrated: Marker and Watercolor Techniques by Christina M Scalise.
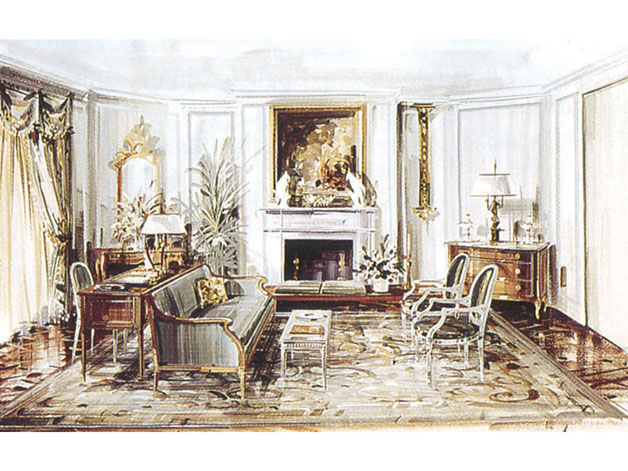
A watercolor rendering from Interior Design Illustrated: Marker and Watercolor Techniques by Christina M Scalise.


A watercolor rendering from Interior Design Illustrated: Marker and Watercolor Techniques by Christina M Scalise.
Natalie Gutierrez. Marker, color pencil, ink on marker paper.

Francis Redublo. Marker, color pencil, ink on marker paper.
Johann Hoeflich
* Estimate only. See instructor and calendar for specific due dates. Summer Session schedule is more compressed with one week equal to approximately two and half semester weeks.
CSULB | COTA | DEPARTMENT OF DESIGN | BIO

Questions, feedback, suggestions?
Email me with your recommendations.
©2020 Michael LaForte / Studio LaForte, All Rights Reserved. This site and all work shown here is purely for educational purposes only. Where ever possible student work has been used or original works by Michael LaForte.
Works by professionals found online or in publication are used as instructional aids in student understanding and growth and is credited everywhere possible.