DESN 230 — VISUALIZATION FOR INTERIOR ARCHITECTURE | FALL 2019 | T/TH 1:00–3:45PM | RM#
P1 | MODERN FURNITURE IN CONTEXT
3 weeks
PROJECT OVERVIEW
Your client, Mike Trout has just purchased a beautiful $9.2m home in the Newport Coast area. You can visit Realtor.com article to learn more about your client’s luxurious new home.
The home furnishings in the photos are from staging, your client would like you to personalize it with sophisticated modern design.
Choose a specific designer from one of these four luxury brands—you have a business relationship with ONE of these:
BoConcept (dn), Ligne Roset (fr), Roche Bobois (fr), B&B Italia (it), Cassina (it), Knoll (us), Herman Miller (us), or Kelly Wearstler (us)
Use Poggenpohl and/or Pirche as a reference for your kitchen and
bath design solutions.
You may propose other design suggestions such as material changes, you might like to make, but no major structural changes.
Use images from the article (and other sources) to use as an underlay to your sketch renderings. Screen capture or download images, print large 1-each on 11x17”, use as trace underlay to Present three rooms—LR, Kitchen, Master BR, and/or Master bath.
The firm you’re working, despite having high-end clientele, they work in a very tactile and traditional way, meaning they do not use any 3D modeling software. You will need to render in a traditionally rendered, ie hand rendered style using markers, ink, color pencils, and white gouache.
Watch the video demos provided below to practice your own technique.
Learn by Seeing, Touching, Smelling, Feeling, Sitting in person. GO to a Retailer for a Visit.
If you live in Orange County visit SOCO/TheOCMix off the 405 in Costa Mesa. Visit Design Within Reach, Pirch, HD Buttercup, Roche Bobois, and Ligne Roset.
If you live in LA, visit the intersection of N. Robertson Blvd and Beverly Blvd where you'll find Roche Bobois, B&B Italia, Kartell, Poliform, and others. A short jump north of there and you can visit the Pacific Design Center, and/or go along Melrose, East of La Cienega Blvd and check out Kelly Wearstler.
PROCESS / METHODOLOGY
Trace Drawing - Print images from the home to use as underlays for creating a competent ink drawing you can use to render into with markers.
Document - When your hand renderings are done you'll need to Scan (best) or take excellent photographs (acceptable if taken in good, even light) your three hand sketch-rendered scenes.
Retouching / Refining - Use Photoshop to do minor retouching, color enhancements, add people or silhouettes, plants, etc. See demos provided or others available from Lynda.com or YouTube.
Presentation - Use InDesign (or SketchUp Layout) to create a presentational layout with each room on its own sheet along with the image of the original room. Include captions and a sheet heading. Organize your work, add image references, text, etc. to create a complete presentation 11x17" book, landscape format only.
Include additional sheets which complement your rendering(s), use images of the furniture you’ve chosen from the brand’s website. Don’t forget to include lighting/fixture images as well. Include material palette images—marble, wood finishes, etc.
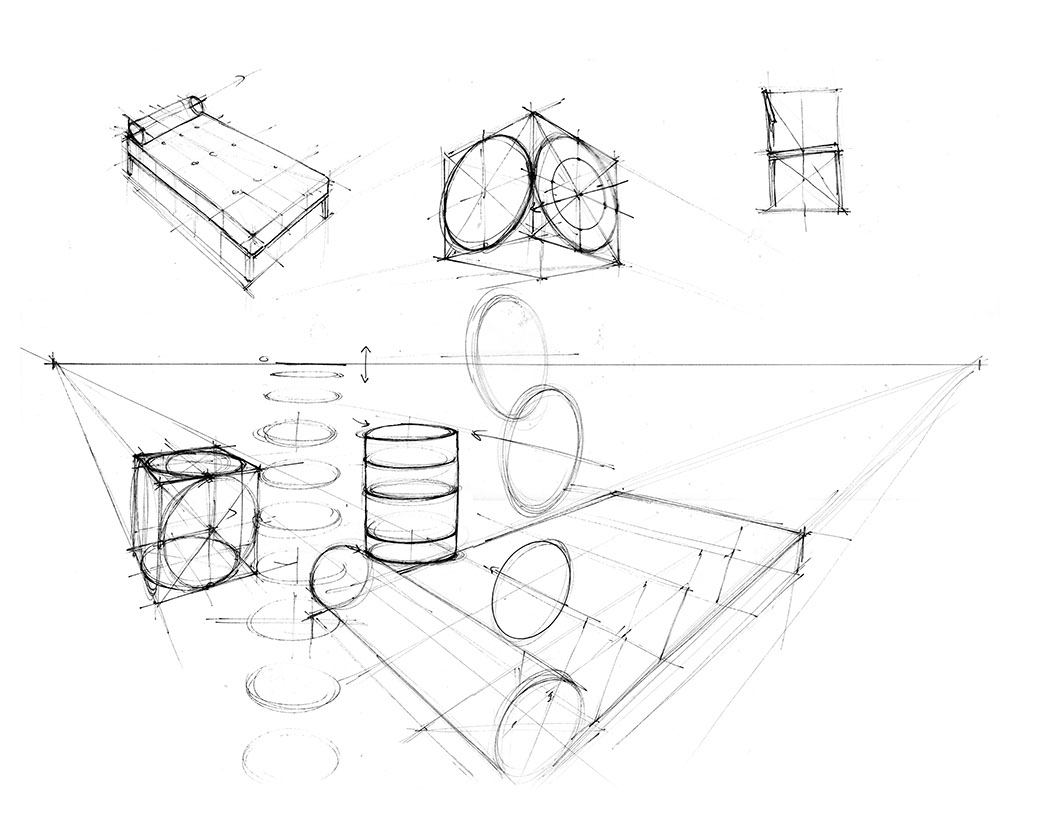
Basic/Primitive Forms Review. As you're designing, take note of the 6 principal geometric forms, throughout designs. Note that most objects/designs often contain at least two principal form types.
Materiality Studies. Your designs should show off your ability to represent a variety of different materials, textures, color palette, etc. therefore all pieces must incorporate at least two different materials and textures.
Render
3 perspective views, 1 of each priority space
1 Orthographic for each room
Rendered floor plans of each room
Add shadows indicative of the designed form logic
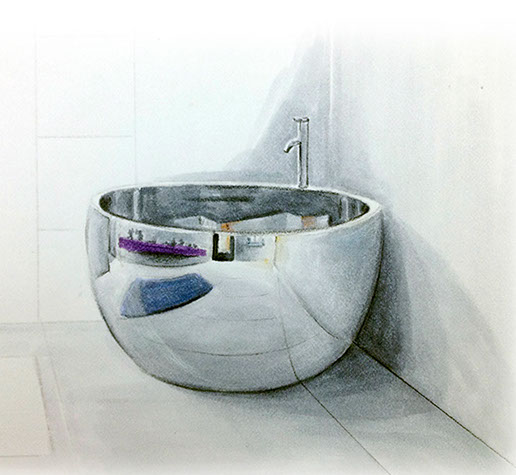
Add reflectivity/polished surface effects—ground plane (vertical) reflections for added character/personality—to the best of your abilities.
Layout Sketch Construction (underlay)
Articulate (draw) Design choices
Rendering for - Photoshop
Layout & Presentation - InDesign
Students who have trouble with scale, proportions, foreshortening, etc in perspective may need to use a 2-PT Perspective Grid system to control your objects and proportions. There are a variety of systems used by designers that have some variation, but all good grids generate a good proportioning and control system for drawing. Use a system you're most familiar with.
HOWEVER, you do not need to use rigorous traditional mechanics, use a good underlay, and develop your sketching ability.
PRINCIPAL FORMS
- Cube/block
- Sphericals
- Cylinder Vertical
- Cylinder Horizontal
- Pyramidal, and
- Conicals
COMMON MATERIALS (to be considered), mix and explore variety
- Fabric, including Carbon Fibre
- Polished, Reflective, Chrome, Brass
- Wood
- Antique, Patina'd or Aged Metal
- Stone
- Leather
DELIVERABLES
2-3 - 11x17" sheets, may be inkjet or laser printed from Photoshop or InDesign layout in the end.
Annotation text indicating the known name of the piece of furniture and designer. Errors will result in grade reductions.
Include your name on your sheet using Exceptionally well crafted designer's lettering, or type set digitally.
Evidence of your base plane "grid" must remain evident in your final. Keep it light, faint, but subtley visible.
Upload FINAL layout images in either JPG or PDF format to your Dropbox.com folder - check your university email for the invitation.
RESOURCES & REFERENCES
See right side bar menu for grid construction, materiality, reflections, etc.
Video Tutorials
by Peili Wang
Kitchen Sketch (2-pt)
Bathroom Sketch (2-pt)
Living Room (2-pt)
by Ariel Brindis
Living Room (1-pt)
Kitchen Sketch (2-pt)
Books
Interior Design Illustrated: Marker and Watercolor Techniques. Christina M. Scalise. Bloomsbury Publishers. ISBN-13: 978-1609019174. Preview Sample Available Here
Sketching Interiors: From Traditional to Digital. Suining Ding. Fairchild Books.
ISBN: 978-1-56367-918-6
Design Graphics: Drawing Techniques for Design Professionals. Peter A. Koenig. Prentice Hall.
Portfolios for Interior Designers. Maureen Mitton
Perspective and Sketching for Designers. Jessica Newman, Jack Beduhn. Pearson Publishing. ISBN 0-13-257494-2
Drawing and Designing with Confidence: A Step-by-Step Guide. Mike W. Lin.
Wiley Publications
Grid Theory - Learn how to organize your layouts so familiar things, like headings, aren't bouncing around from page to page. Good design really is invisible design.
"We spend most of our time trying to get design out of the way."—Jony Ive
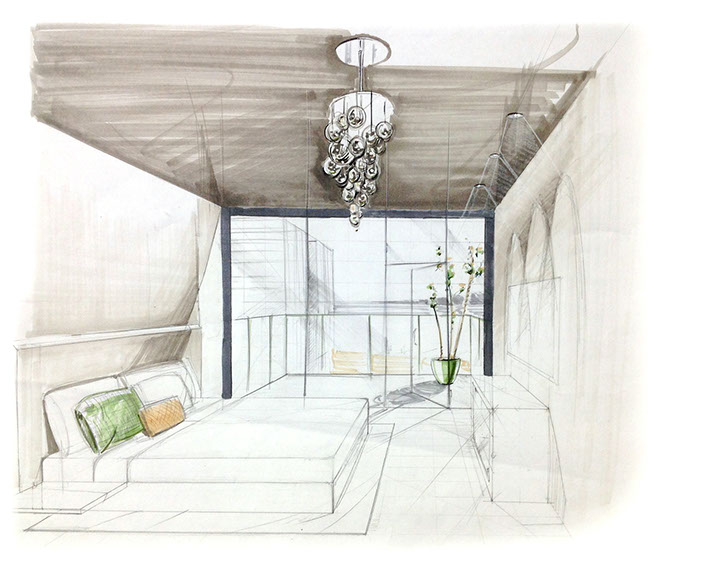
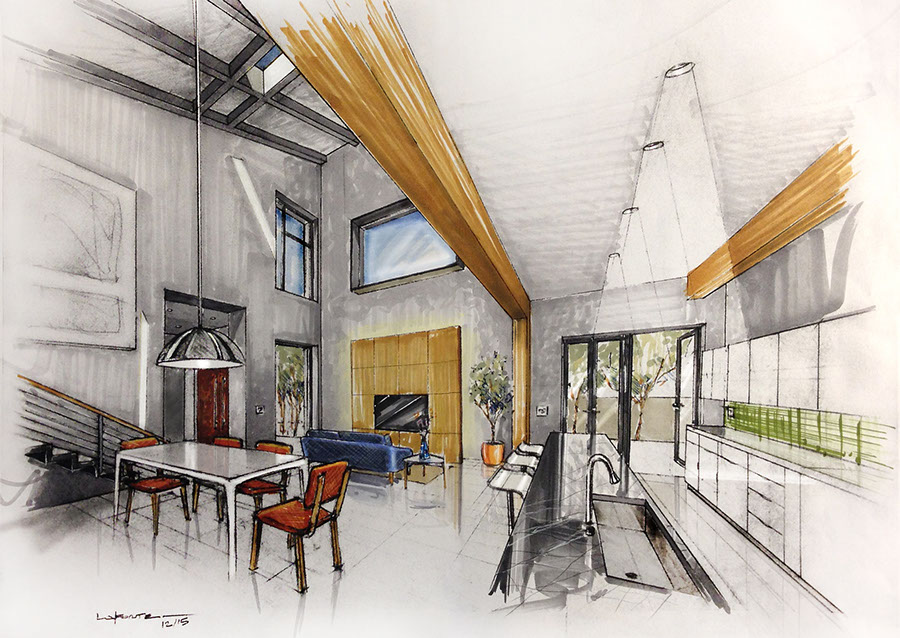
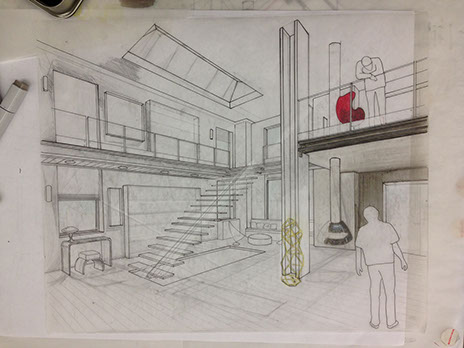
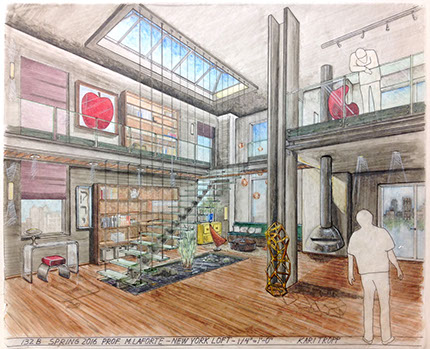
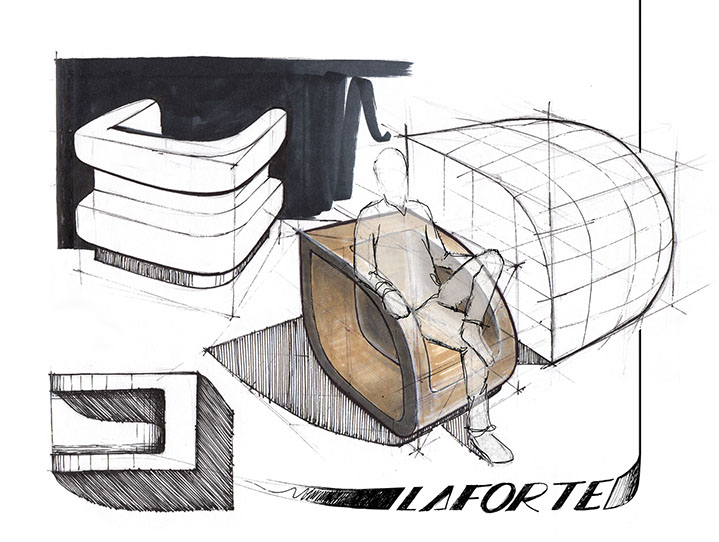
Rendering (above) just started. Much to add. Rendering (below), approx.
2 hours drawing (from scratch, no underlay), 2 hours marker rendering on 11x17" Bond.
TUTORIALS & HOW-TO GUIDES
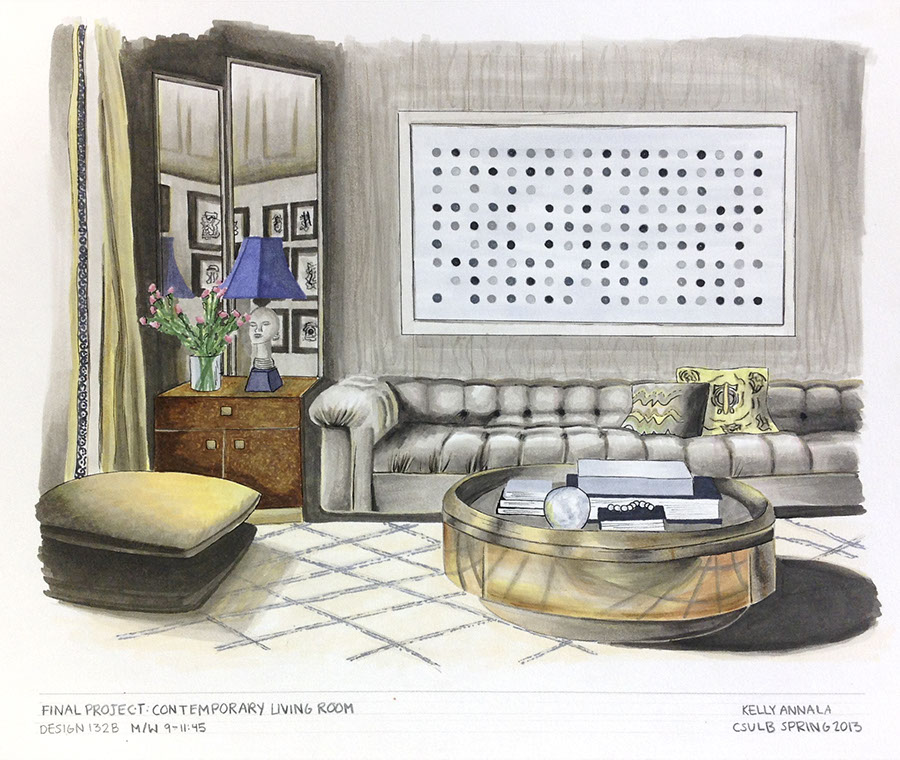
STUDENT (HAND) RENDERINGS


ICONIC MODERN PIECES, MATERIALITY
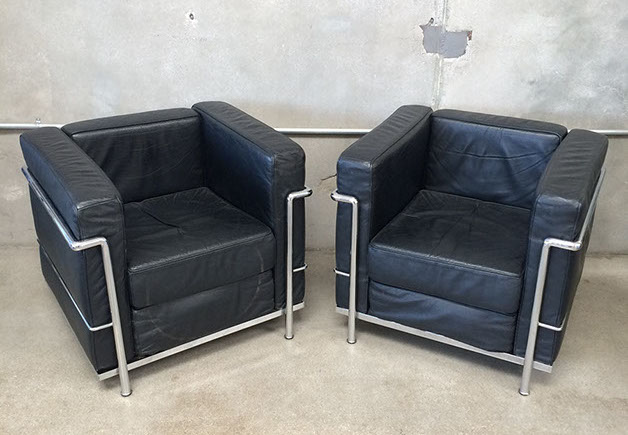
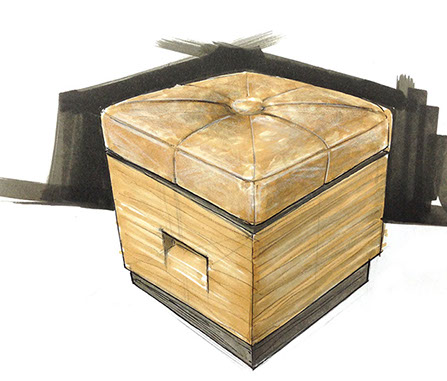
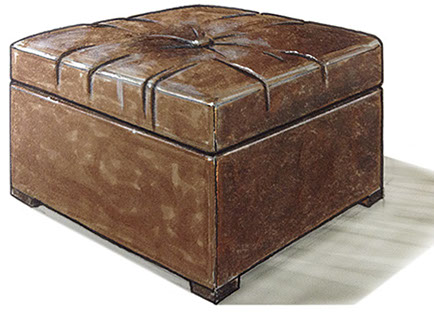
CUBES
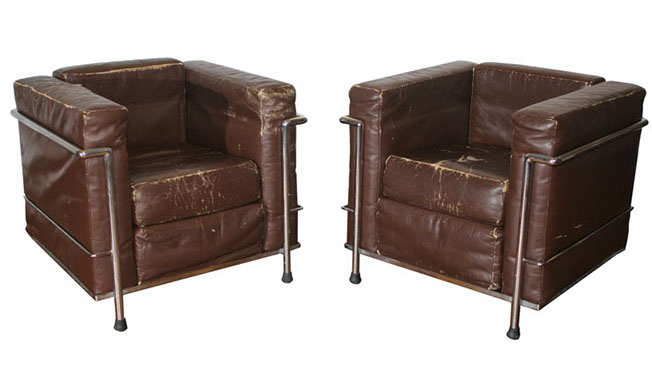
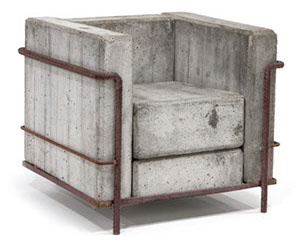

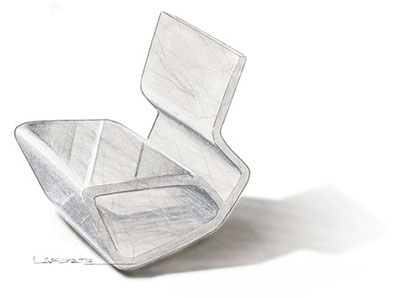
Stefan Zwicky. Concrete and steel re-interpretation of Corbu's iconic arm chair.
Le Corbusier arm chair
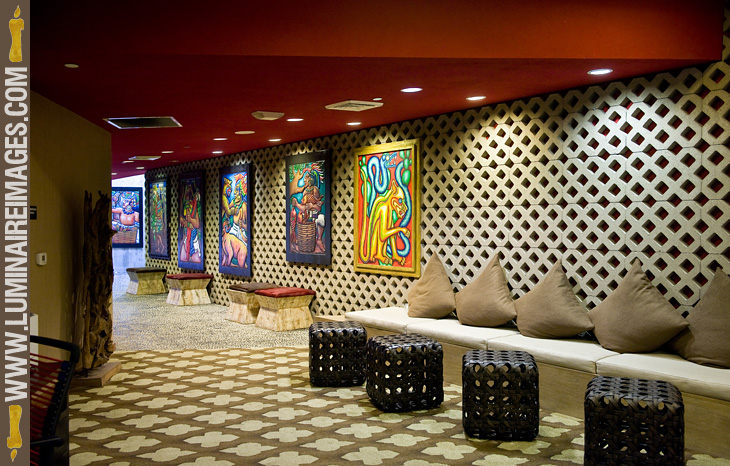
Wicker "cubes" with rounded edges, Ottoman's at Hotel Maya, Long Beach. designer unknown
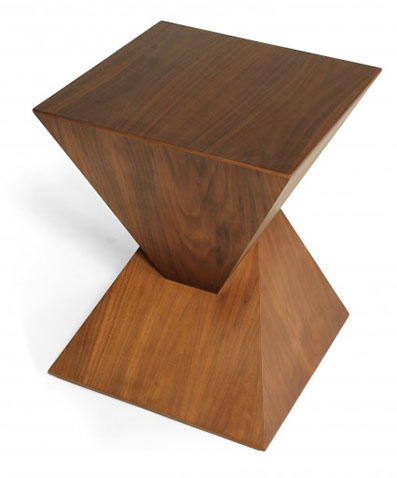
PYRAMIDALS
Designers unknown
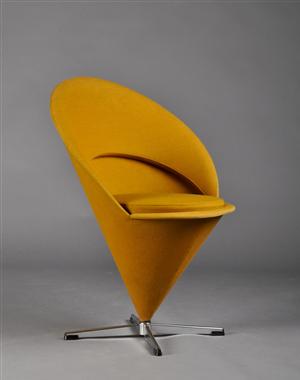
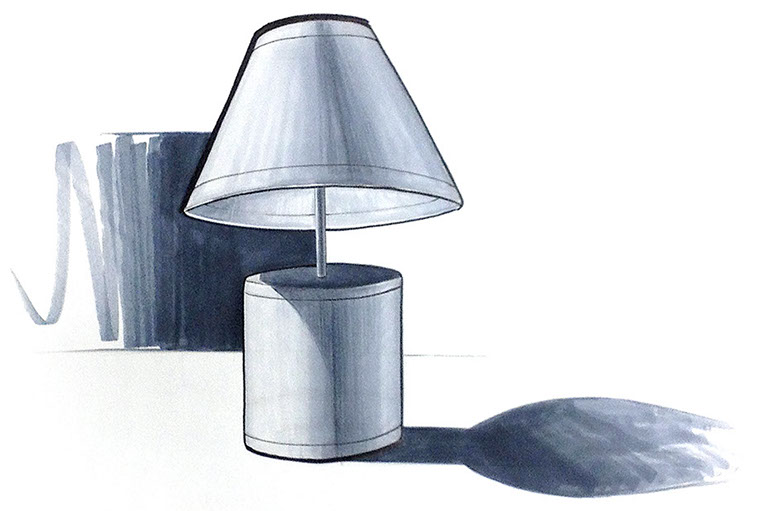
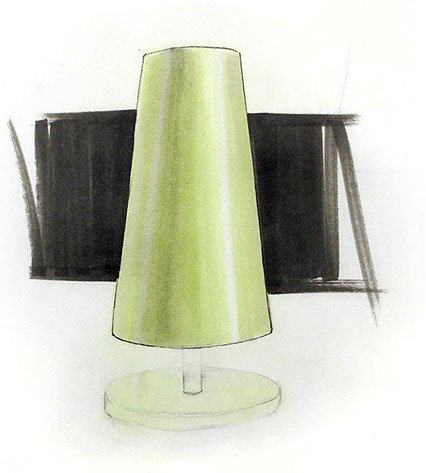
CONES
Cone Chair, Verner Panton. 1958
Kone Dirt Devil vacuum by Karim Rashid

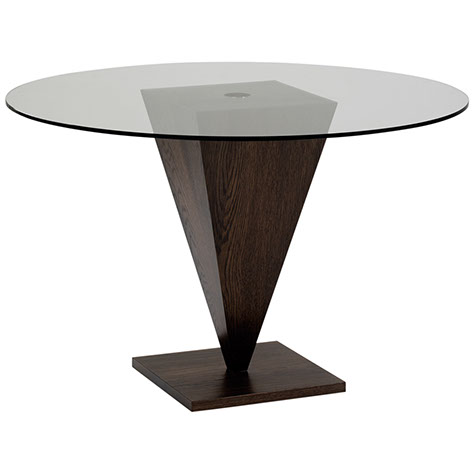
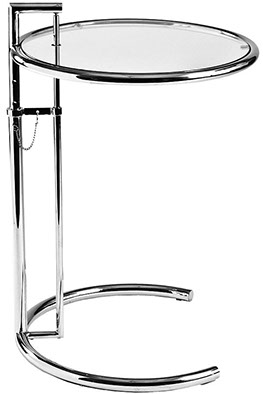
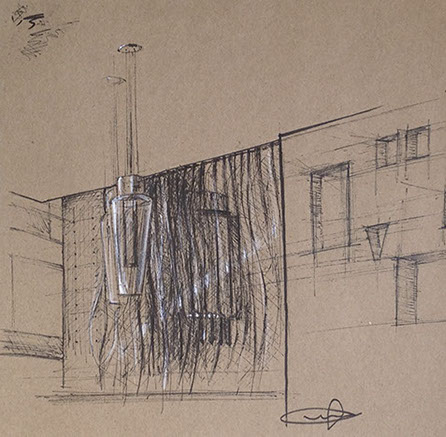
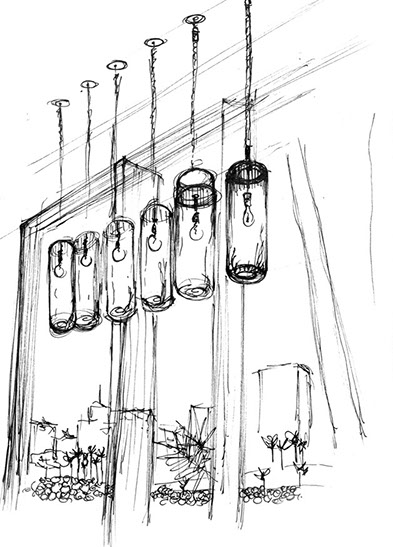
CYLINDERS, VERTICAL
Eileen Grey end table
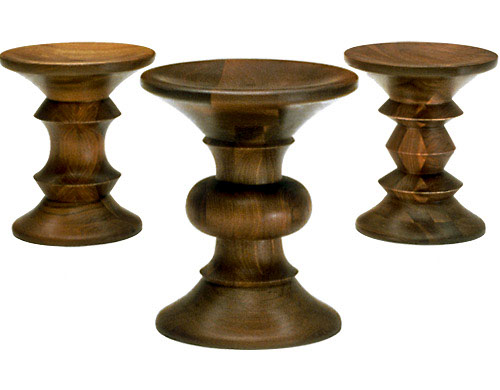
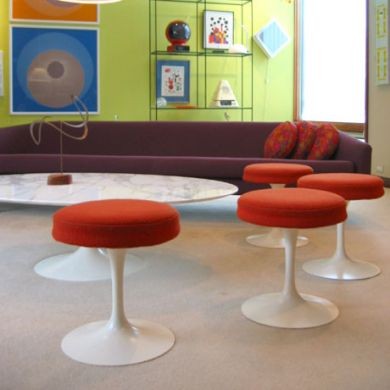
Walnut stool by Charles and Ray Eames. 1960
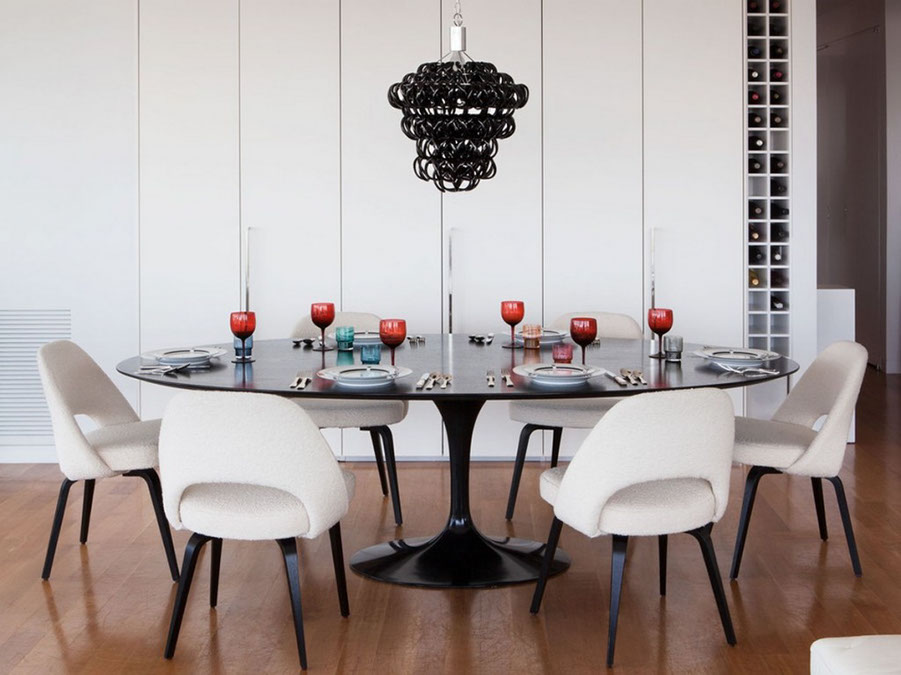
Left: Tulip Dining table with marble top by Eero Saarinen with Eames bent wood chairs.
Right: Saarinen Tulip coffee table and stools.
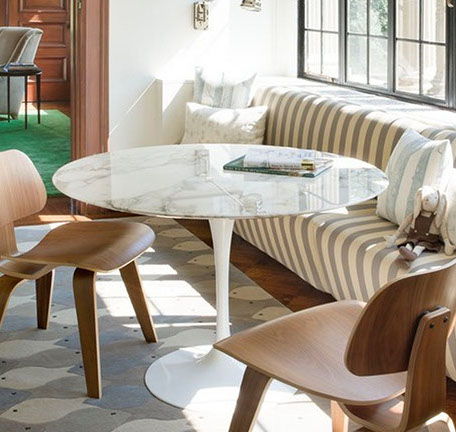
Tulip Dining table and chairs by Eero Saarinen. Notice the mirror reflections in the black surface!
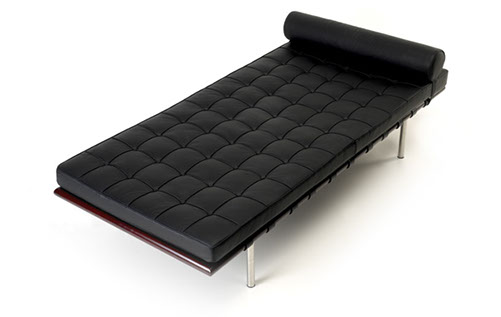
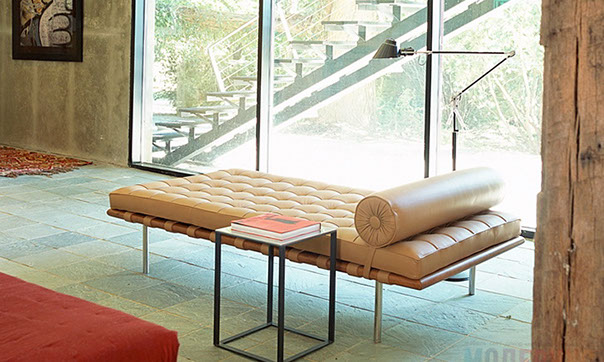
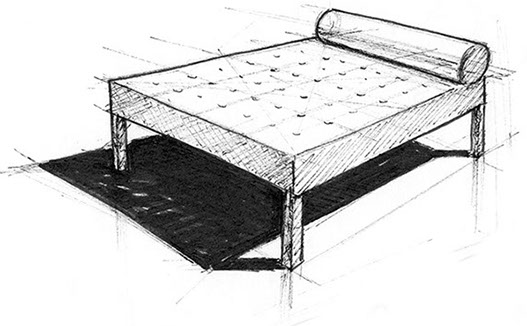
CYLINDER, HORIZONTAL
Mies van der Rohe Barcelona daybed. Uniformly divided plane with horizontal cylinder head rest.
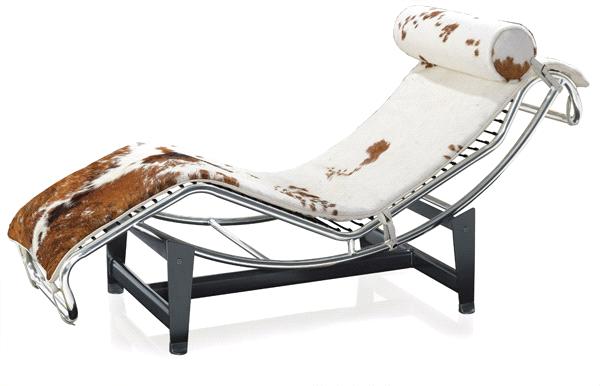
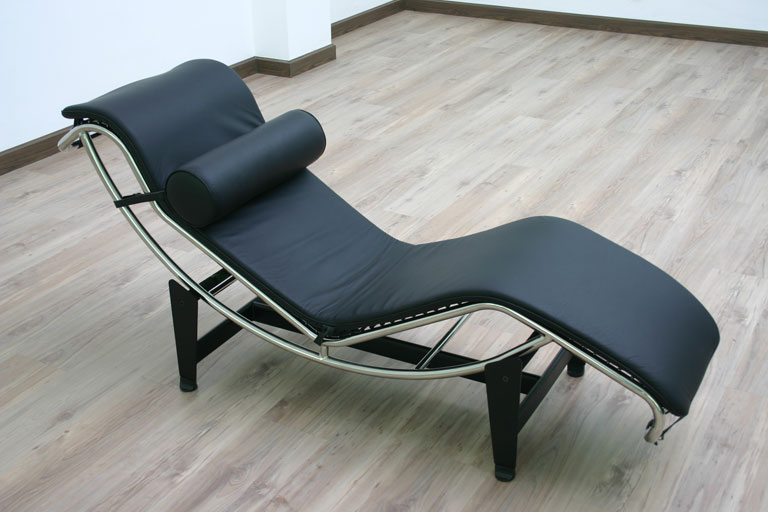
Le Corbusier (Corbu) chaise lounge with cylinder head rest; natural cow hide (right); black leather (below).
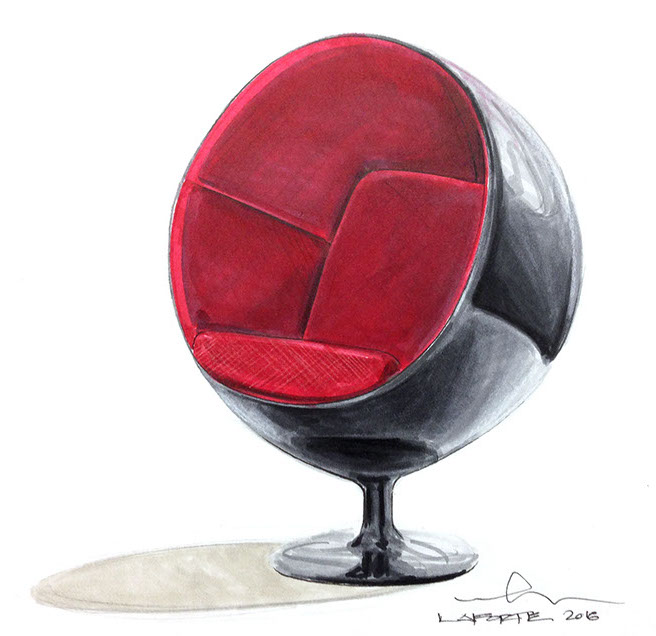
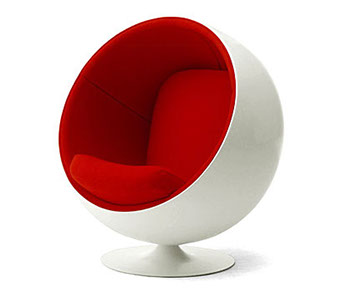
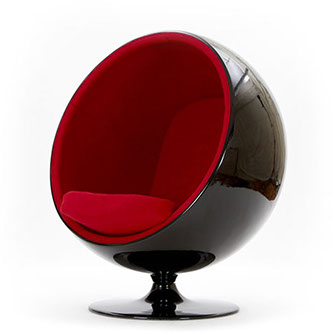
Aarnio Ball Chair
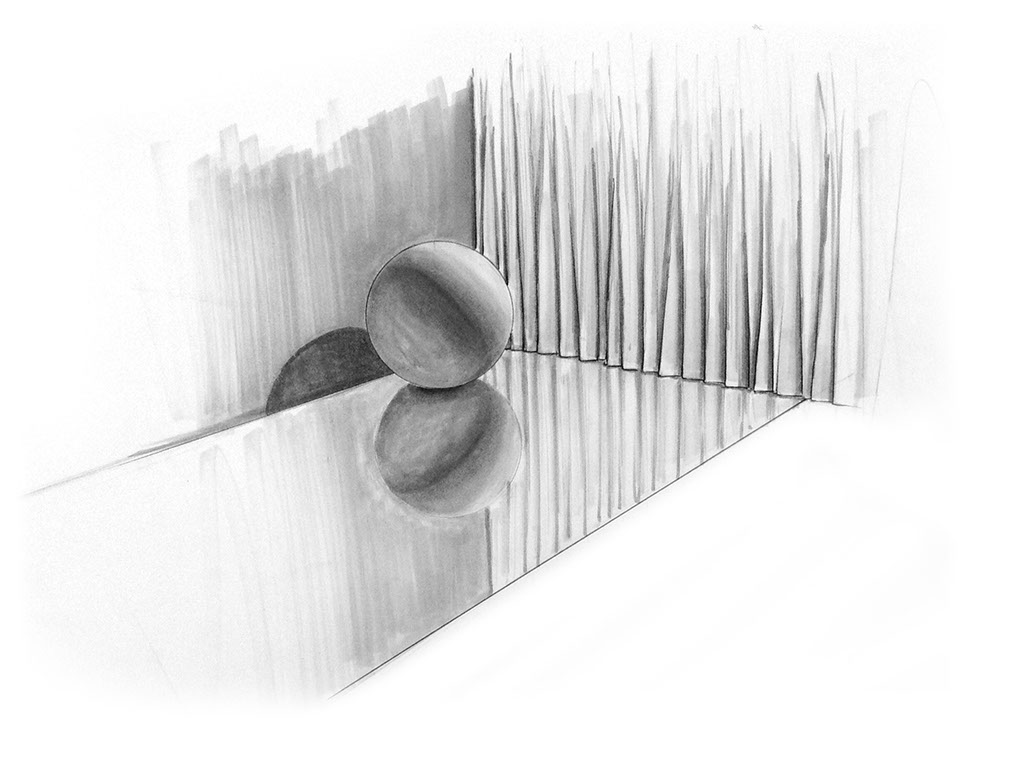
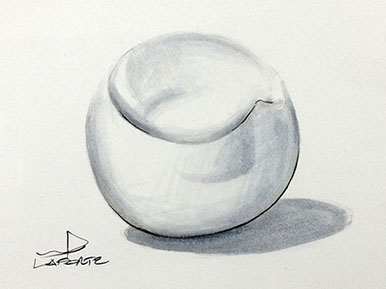
SPHERES
Arne Jacobsen Egg Chair
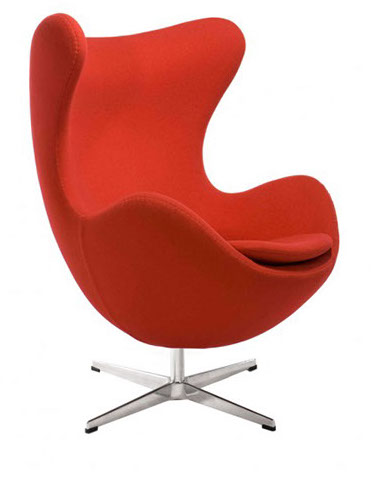
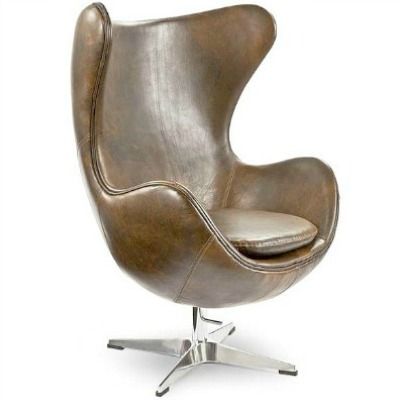
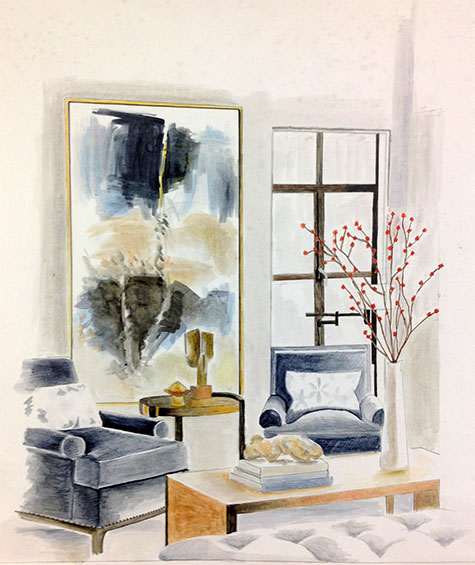
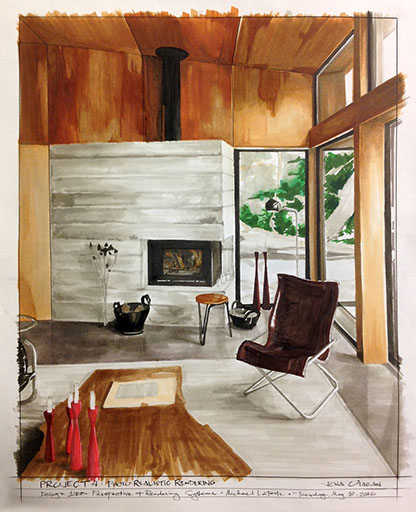
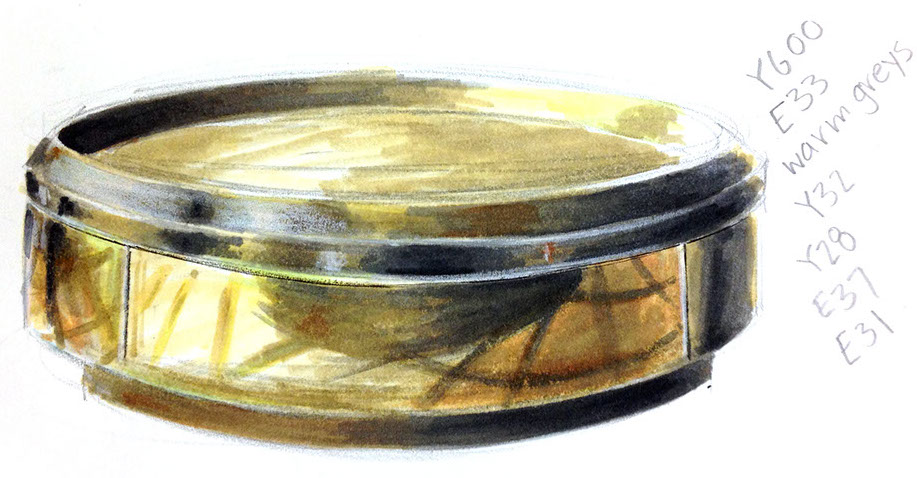
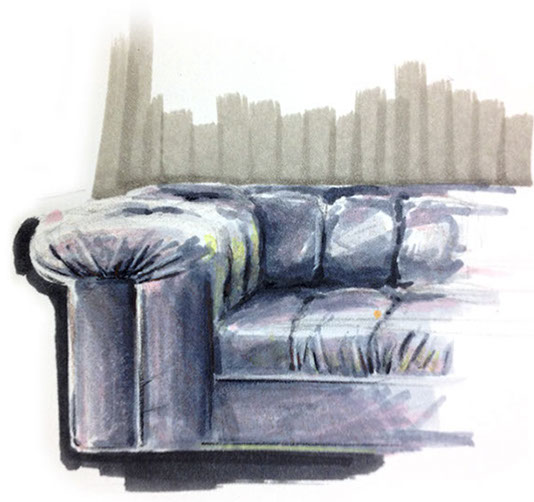
Notice both of these examples have strong application of shadow casting and the bottom case includes reflections in the floor. Both of these are marker, Prismacolor Premier pencil, and ink, on trace paper. 14x17".
DRAWING AND RENDERING STUDY EXAMPLES
See more material representation under the Materiality Matrix section of this site.


STUDENT LEARNING OBJECTIVES (SLOs)
- Introduce students to important designers through iconic modern furniture.
- Challenge students to make choices and develop surface
changes based on core shade and rendering logic. - Challenge students to commit to strong line development.
- Develop student's understanding and development of primary form logic.
- Challenge student's imagination in creating material representation.
GRADING AND EVALUATION RUBRIC
The following Rubric will apply in assessment of the student's work product, presentation, and/or process:

Specific Grading
- Rendering’s adherence to perspective.
- Renderings are lively and make good use of color/value, contrast, materiality, textures, details.
- Drawings have a range of ink line weights—thin to thick—at least 4.
- Photoshop work is clean, no dingy Grey paper.
- InDesign layouts are clear, well organized, consistency of placement/alignments, ie use of grids, and PRIORITIZE the CONTENT (focus) over decorative treatments (distractions).
points2020202020criteriaAdherence to project instructionsFormat & Structure of Document (shows process)Content/ResearchAbility to satisfy requirements of BriefAdherence to Design Conventions
* Estimate only. See instructor and calendar for specific due dates. Summer Session schedule is more compressed with one week equal to approximately two and half semester weeks.
CSULB | COTA | DEPARTMENT OF DESIGN | BIO

Questions, feedback, suggestions?
Email me with your recommendations.
©2020 Michael LaForte / Studio LaForte, All Rights Reserved. This site and all work shown here is purely for educational purposes only. Where ever possible student work has been used or original works by Michael LaForte.
Works by professionals found online or in publication are used as instructional aids in student understanding and growth and is credited everywhere possible.