DESN 232 — RAPID VIZ I | FALL 2019 | T/TH 4:00–6:45PM
1 | TYPE A SKETCHES
TIMEFRAME
2 weeks (Summer week 1)*
OVERVIEW
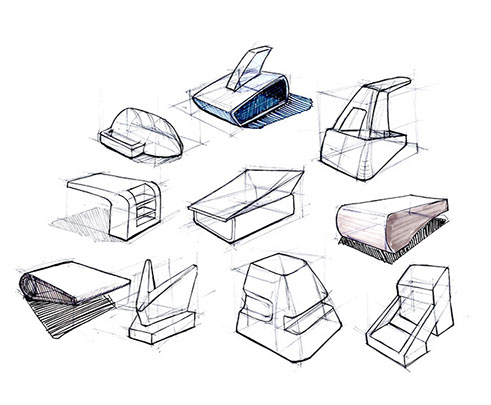
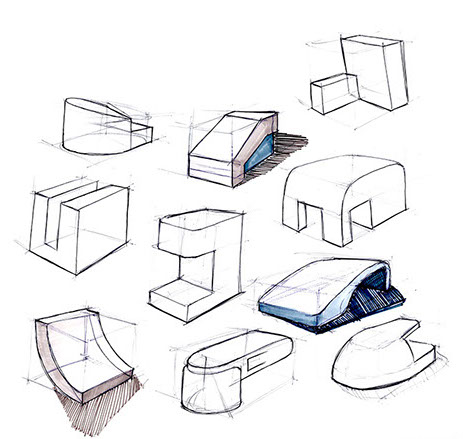
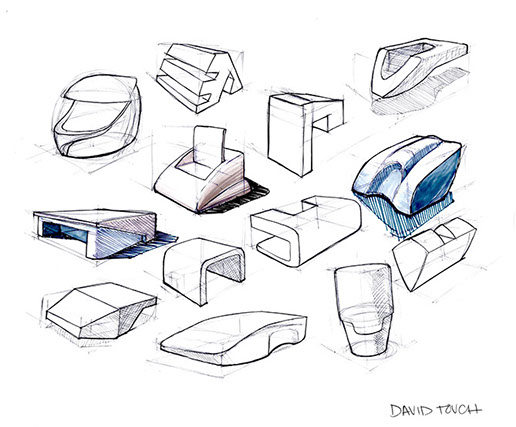
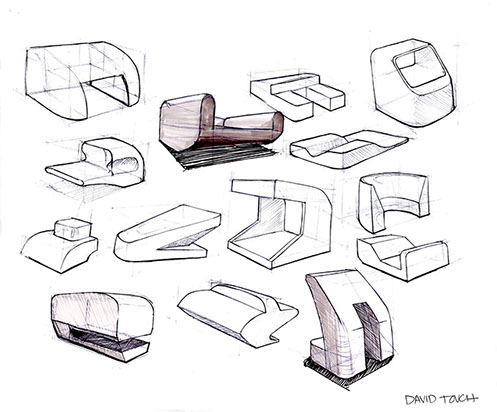
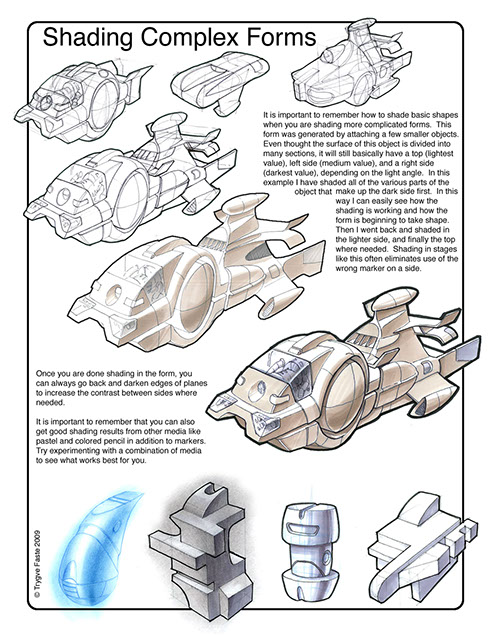
Type A Sketches are a simple method designers can use to develop design complexity by combining simple forms. It's a useful way to build up your design incrementally.
Often, the differences between two designs is quite simple, a slightly different degree of corner rounding, a rounded edge versus a beveled edge, or a crease, a form with a profile which bulges inward or outward, or simply the proportional relationships of intersecting forms, whether details are inset or protrude out from a surface.
Form generation is a vital part of design ideation, from small hand-held instruments up to architecture. This assignment will help spark and/or test
the student's imagination to produce a wide range of formal relationships.
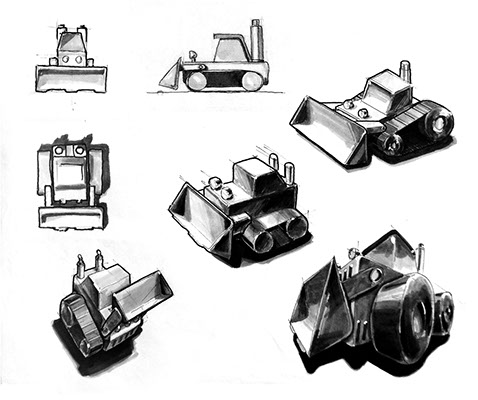
Option A: Design a Children's Toy made of wood.
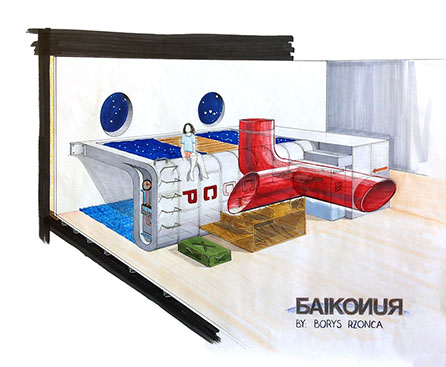
Option B: Design a Playful environment for children within a larger space.
STUDENT LEARNING OBJECTIVES (SLOs)
- Provide students a method for generating complexity in their design exploration.
- Enable students to graphically represent specific choices and develop surface changes based on core-shade and rendering logic,
- Challenge students to commit to strong line development,
- Challenge student's understanding and development of complex form,
- Challenge student's imagination.
GRADING AND EVALUATION RUBRIC
The following Rubric will apply in assessment of the student's work product, presentation, and/or process:

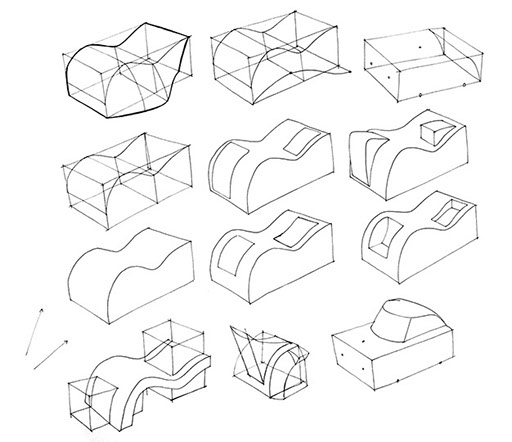
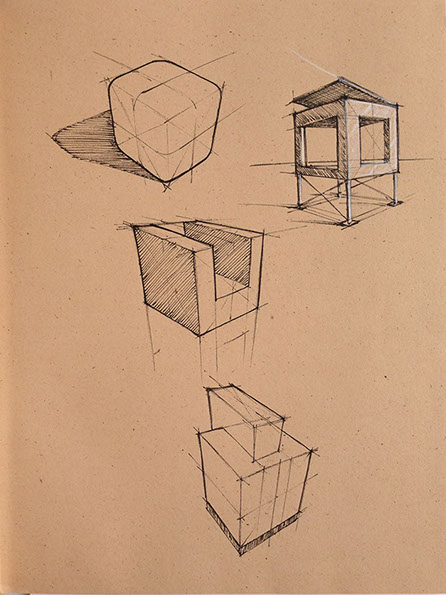
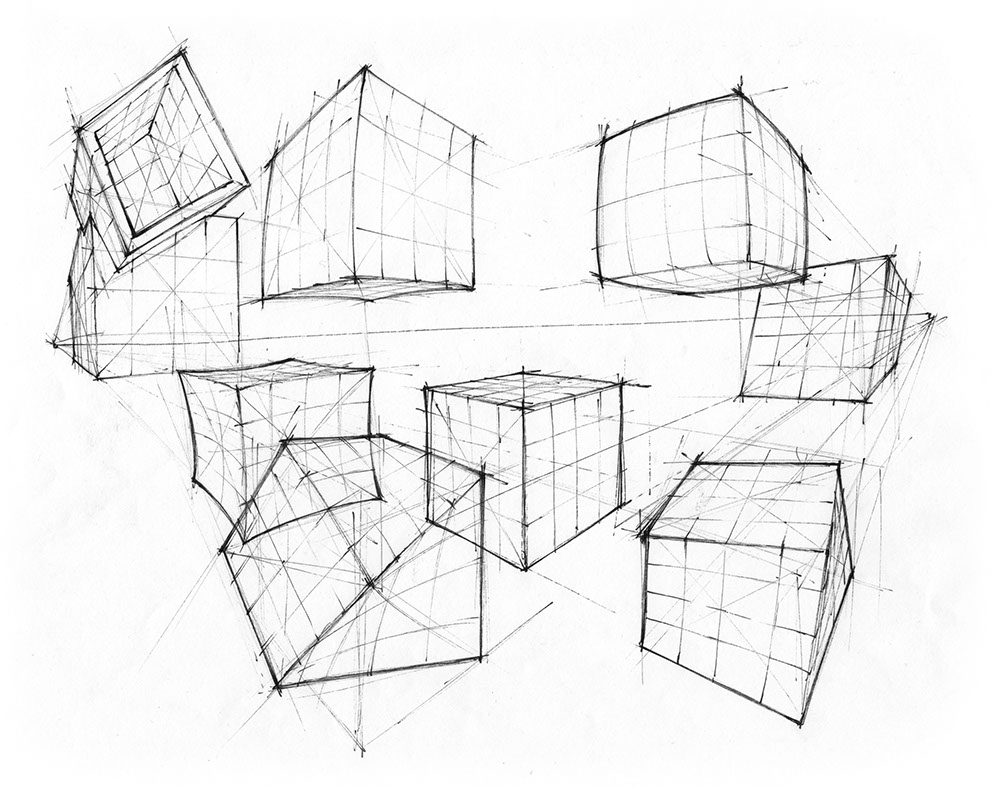
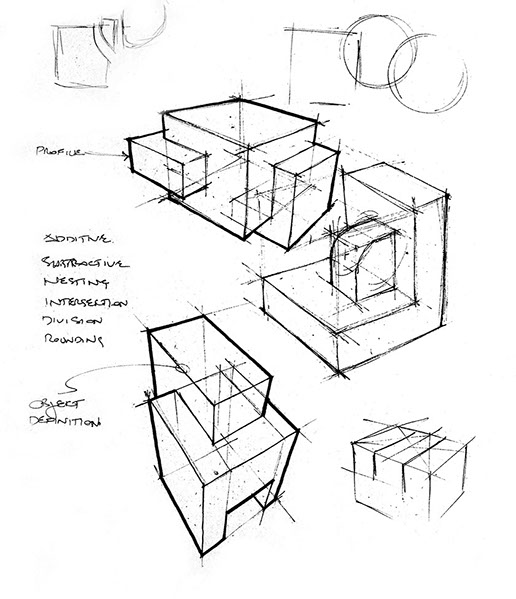
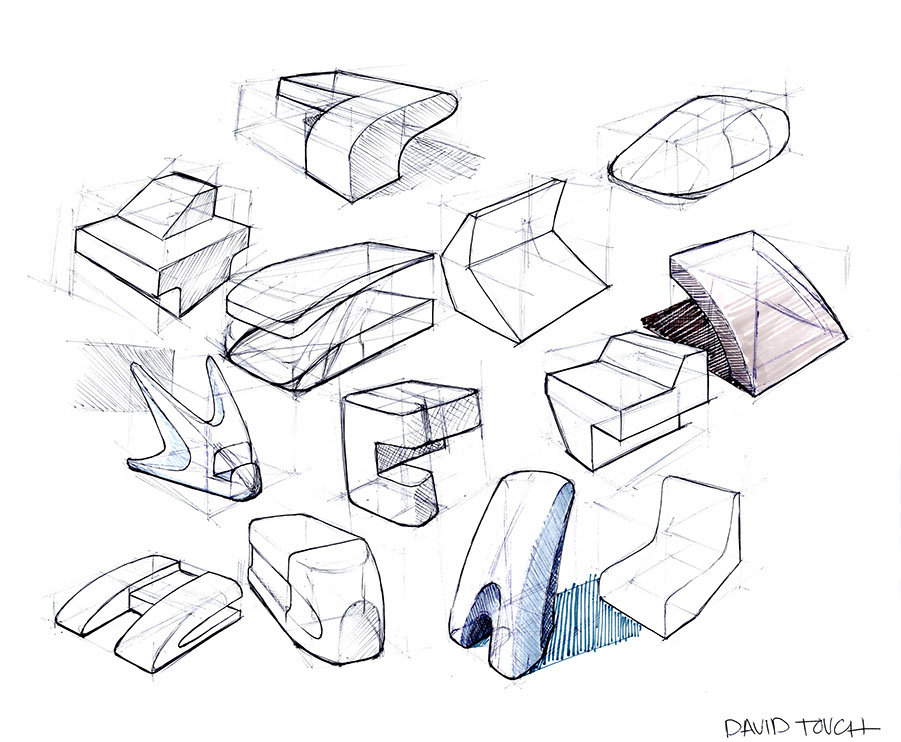
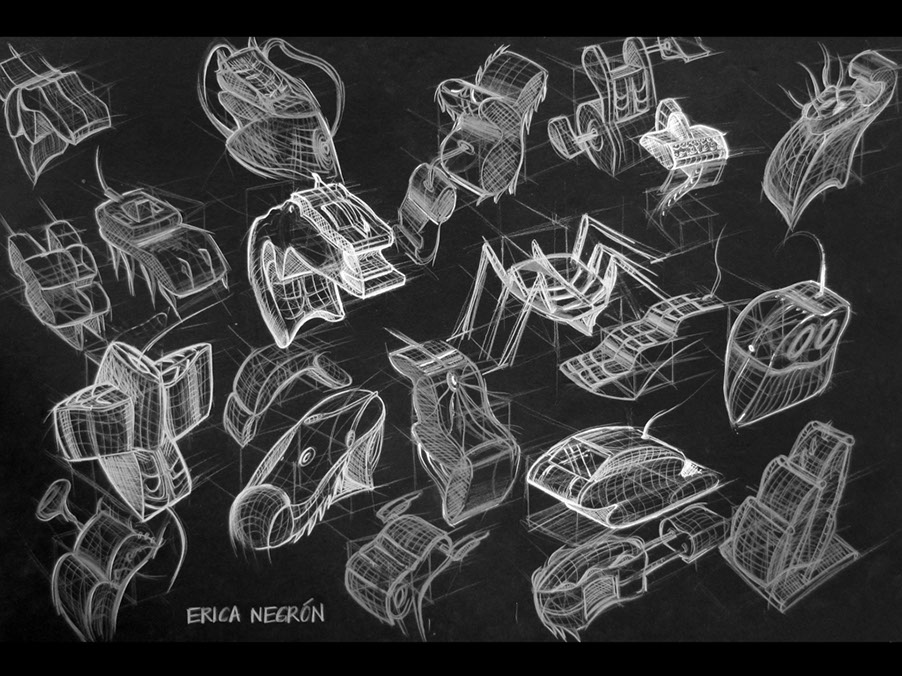
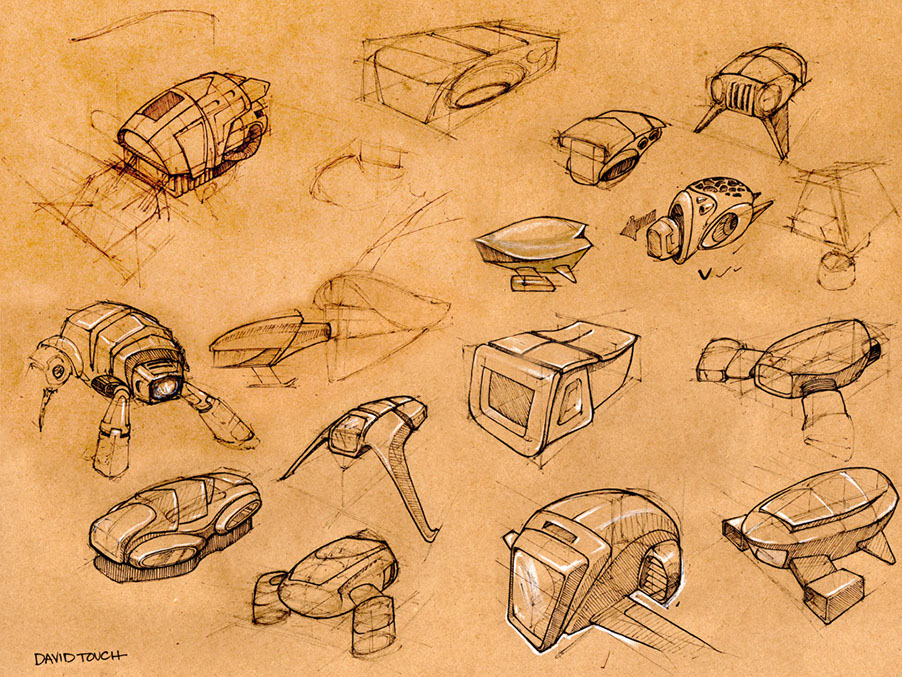
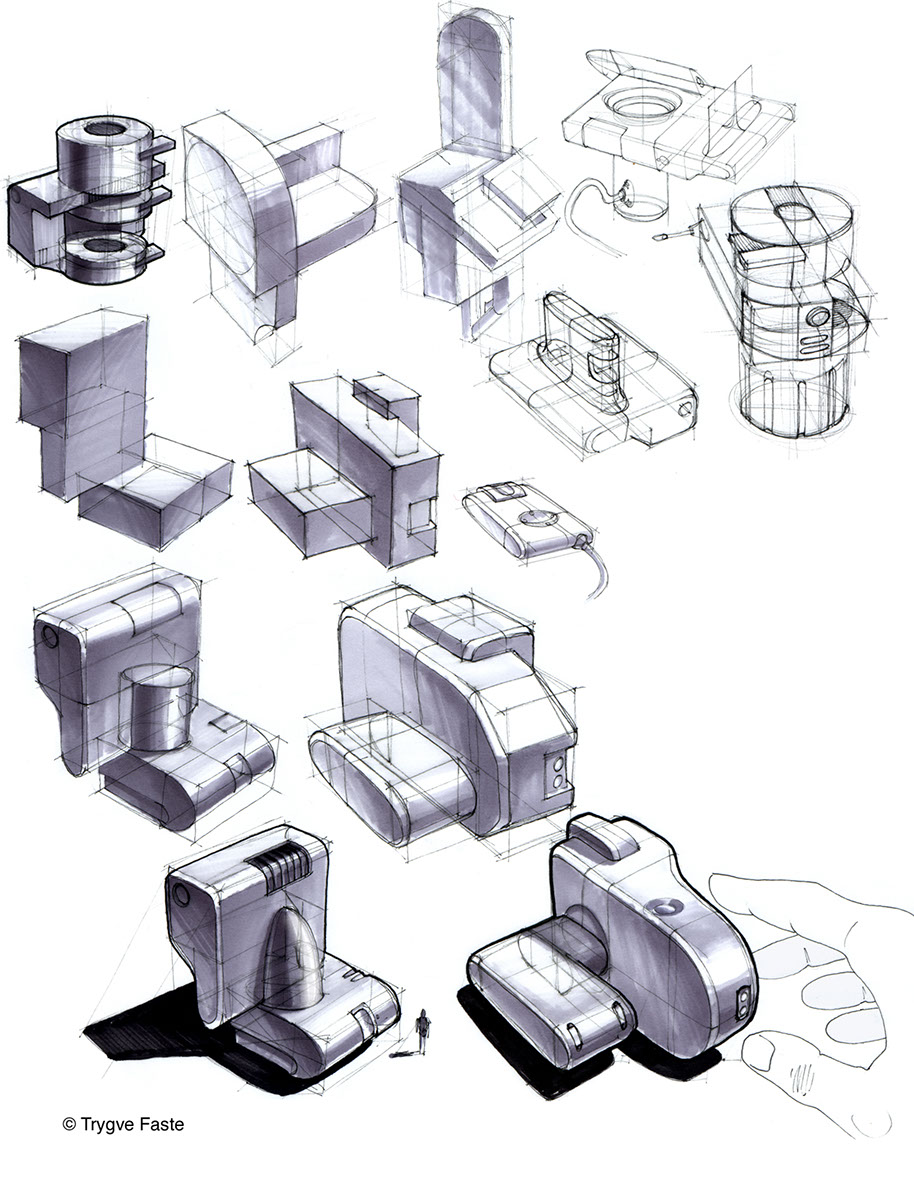
PART 1. FORM GENERATION: GETTING STARTED, USING WIREFRAMES
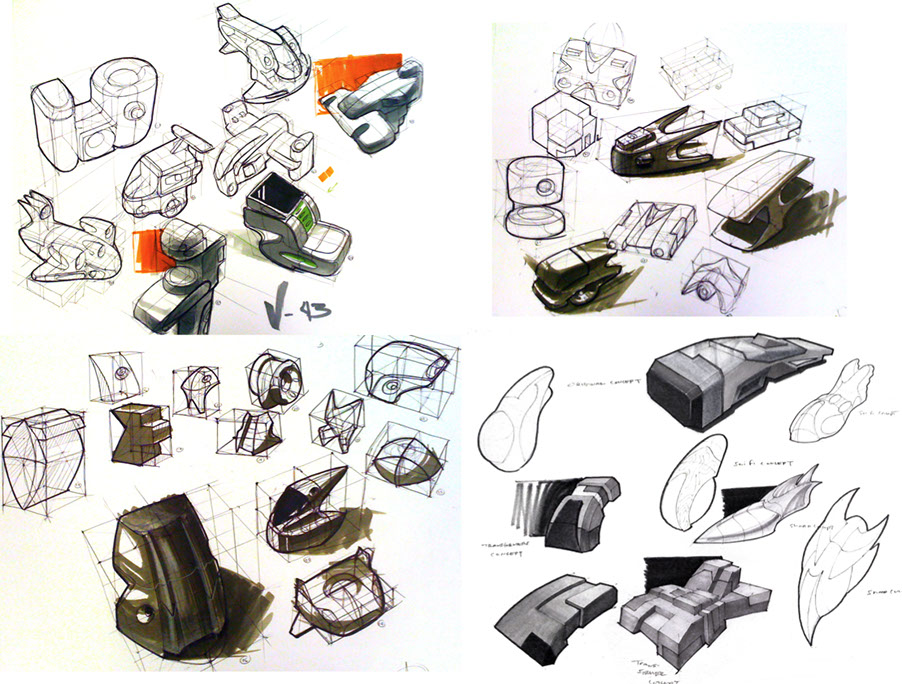
Develop 20 preliminary studies, without preconceived ideas about good, bad, right, or wrong design. Maybe you initially think of a truck, then an airplane comes to mind, then a floating toy, then a tractor, a tank, spaceship, etc. Let your imagination run free and be original.
Work on 11”x17” or 14x17" marker, bond paper, trace, or similar, Freehand sketch basic forms in perspective. Should have about 4-5 objects per 14x17 sheet.
Draw large.
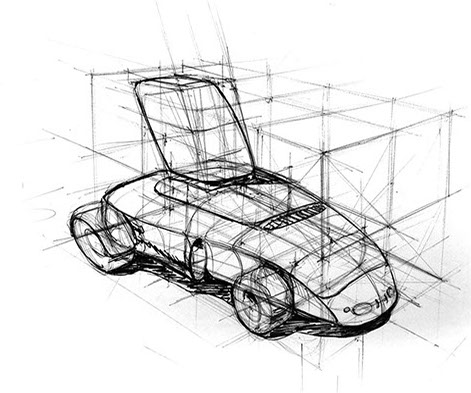
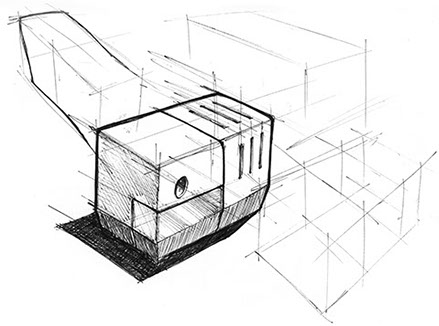
With a basic block or other primitive geometry begin adding to and/or subtracting from the form to "assemble" a more complex object or environment in 2-pt (or 3-pt) perspective only!
Use Graphite (HB lead), Monochrome Colored Pencil (Indigo or Crimson), or Ink pen.
Sketching does not mean a sloppy lack of application of skill. It is simply freehanded, ie. DO NOT use straight-edges, or pins for vanishing points,
No T-Squares, etc.
DRAW-THROUGH. Show the back and hidden edges of the boxes, ellipses, etc. Practice to create light, clean, and confident line.
Be conscious of your sheet compositions - DO NOT CROWD THE MARGINS/EDGES OF THE SHEET, or Fade-off forms as necessary to keep the viewer's eye "in" the page and not distort a form to squeeze it onto the sheet; be true to the form geometry.
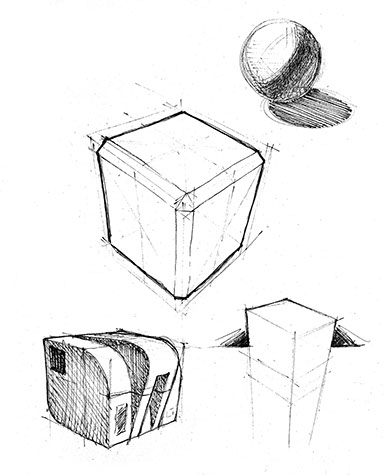
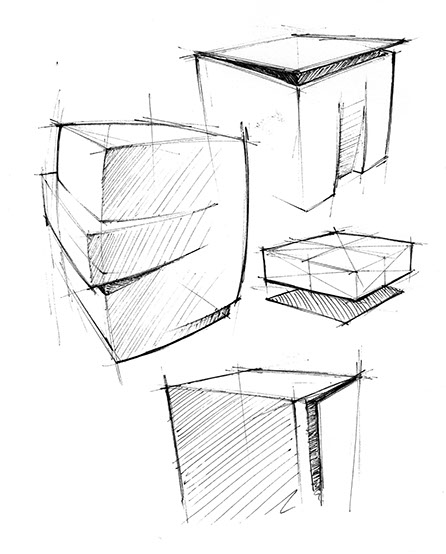
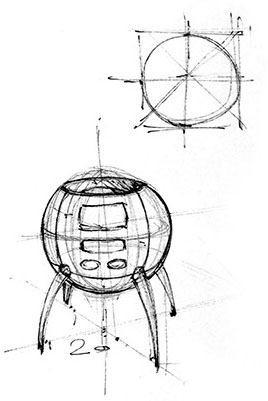
Use the principles of basic geometries—boxes/cubes, ellipses, cylinders, cones, sphericals, etc.
Be able to locate corresponding anchor points across the form, from the front plane to the parallel back plane. These are referred to as anchor points.
Add "parting" and "separation" lines to articulate surface or material separations after you've "blocked-out" or "massed out" the form.
DO NOT ERASE YOUR BLOCK WIREFRAME! Keep it light, use a light hand, but let it live.
PART 2. REFINE, ADD SCALE, RENDER
From your preliminary sketches, refine your line work being more decisive with a minimum of 3 line weights defining each object
Choose 10 to further articulate and refine in one to two sheet compositions.
Using either the human figure (child) or anatomy, contextualize the scale of at least 10 of your forms. You may use photography for underlay tracings, see page Chapter 7.4 in our book, Sketching The Basics.
Carry-over and/or Preserve "layout" lines from your draft studies. When you render, much of it will become less noticeable and also adds interest to the drawing. See examples in the books and from sidebar topics.
Include CENTER axis lines on symmetrical views such as in orthographics.
Include Graphic Arrows which articulate movement or
Your toy or playground should be for toddlers and contain no plastic parts, smooth finished wood and non-toxic painted wood is acceptable.
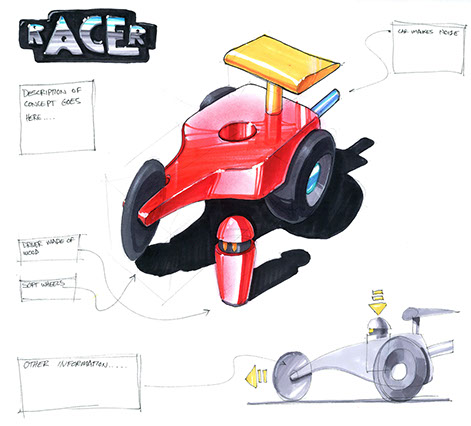
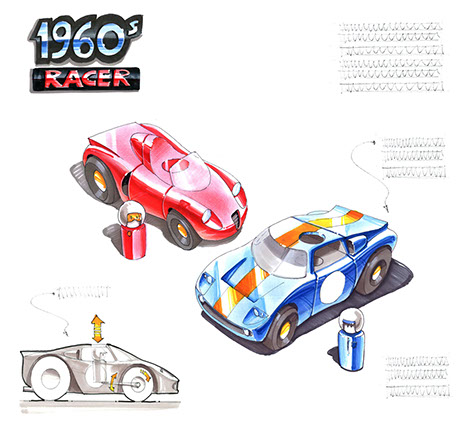
Add annotations to describe parts.
FINAL DELIVERABLE
A Cohesive presentation on a maximum of 2 11x17 or 14x17" sheets which includes:
- a compelling concept name for your toy or play space,
- your name, date of presentation, and name of course (Design 232), AND
- brief descriptive text, annotations, and graphic arrows which describe operable parts, movements, etc.
- A 2-pt (or 3-pt) Perspective. Rendered
- Front, Side, and Top Views. Rendered
REFERENCES AND INSPIRATION
Scale: Human Anatomy and Figure
Our book, Sketching The Basics, Chapter 2 and
Chapter sections 3.3, 4.2, 4.3, 5.5, 7.4.
See videos by IDCreatures covering simple and complex rounds
TUTORIALS & HOW-TO GUIDES
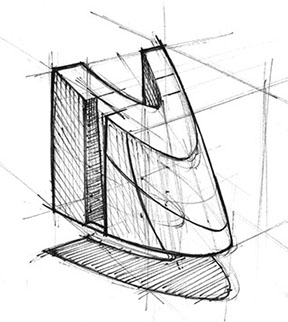
Form Modifiers
- Merge/add forms,
- Subtraction.
Use one form
to remove a geometries, - Rounds. Corner rounding of edges, vary radii,
- Bevels or Chamfering. Control the removal of edges with a flat plane,
- Twist,
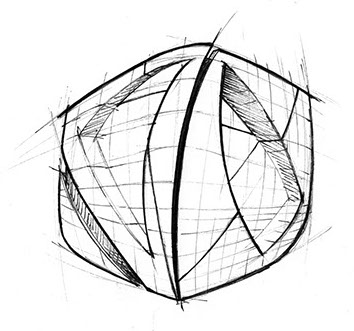
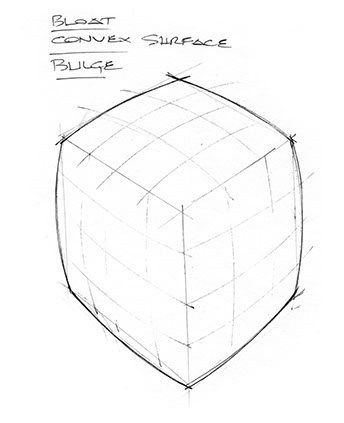
- Bulge or Bloat.
As if the form is inflated with air causing the straight edges
to arc outward, - Pucker. Inward bending,
- Bloating. Form bulges outward,
- Bending. a basic form bends in one distinct direction,
- Skew,
- Distort,
- Stretch,
- Fold
FORM GENERATION WITH CONTROL


TWISTING AND WARPING
BEVELED OR CHAMFERED EDGES
ROUNDING
BULGING OR BLOATING
IDEATION ON ALTERNATE MEDIA
use white prismacolor verithin pencil
ADDING HUMAN SCALE AND RENDER MATERIALITY
PROCESS
Start with a block, or two.
Add more blocks, cylinders, etc. to "assemble" form.
Modify edges with bevels
or rounding.
Describe surface changes with parting or contour lines.
Impart a sense of scale.
Render with markers.
Finalize line weights.

^
* Estimate only. See instructor and calendar for specific due dates. Summer Session schedule is more compressed with one week equal to approximately two and half semester weeks.
CSULB | COTA | DEPARTMENT OF DESIGN | BIO

Questions, feedback, suggestions?
Email me with your recommendations.
©2020 Michael LaForte / Studio LaForte, All Rights Reserved. This site and all work shown here is purely for educational purposes only. Where ever possible student work has been used or original works by Michael LaForte.
Works by professionals found online or in publication are used as instructional aids in student understanding and growth and is credited everywhere possible.