DESN 232 — RAPID VIZ I | FALL 2019 | T/TH 4:00–6:45PM
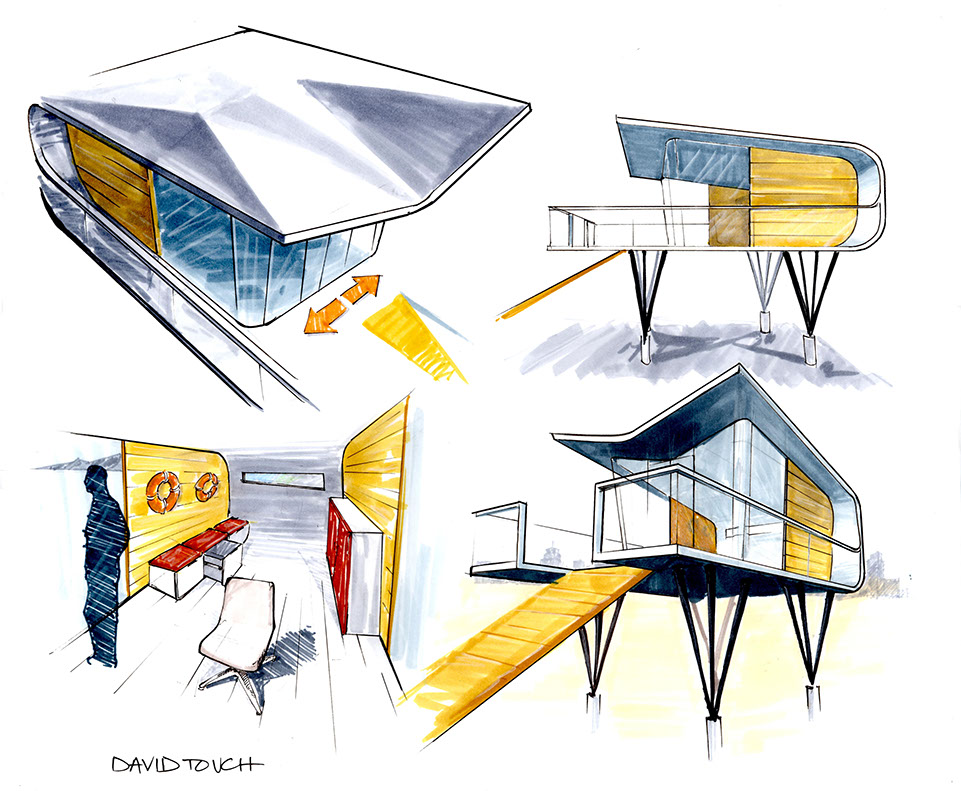
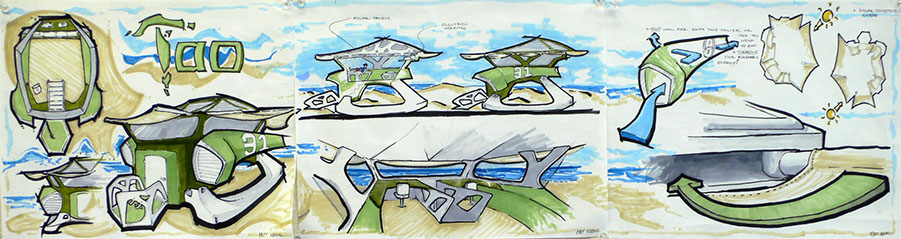
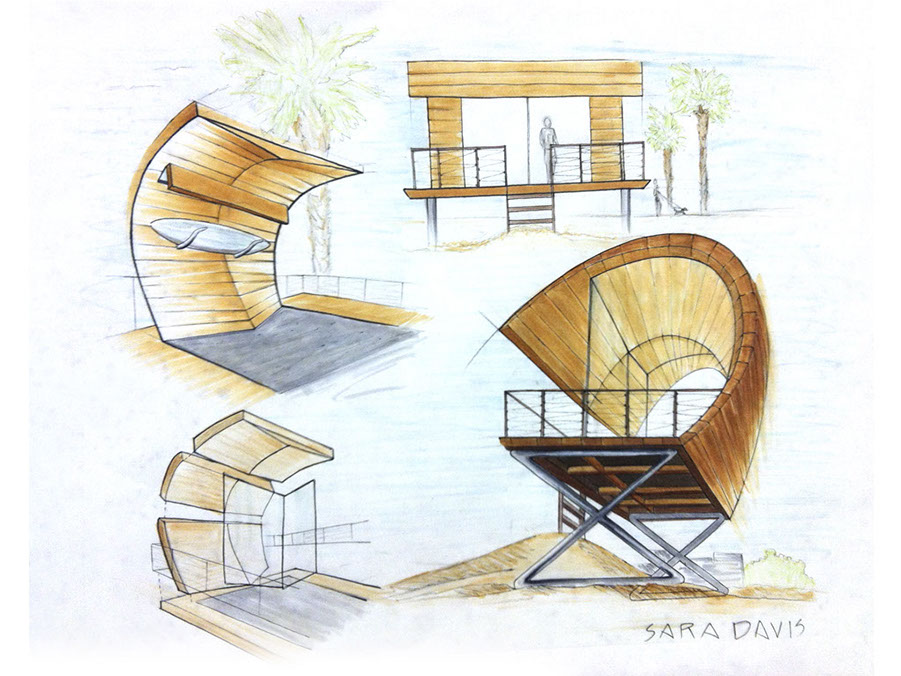
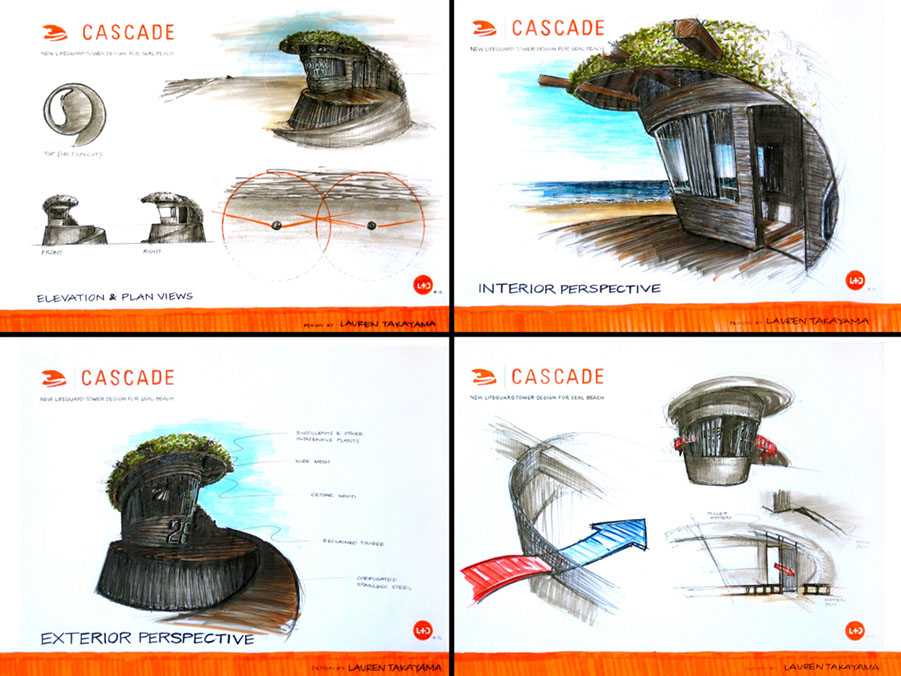
LIFEGUARD TOWER
TIMEFRAME
3 weeks*
STUDENT LEARNING OUTCOMES
- The ability to examine an existing typology,
- The ability to explore criteria affecting a specific typology,
- The ability to create an informed design,
- The ability to present one's ideas clearly.
REFERENCES AND INSPIRATION
Our book, Sketching The Basics, Chapter ...
PROJECT OVERVIEW
Imagine that a furniture company is seeking to create a piece of transforming furniture. They have asked you
to develop a single piece of furniture that can transform into two other pieces of furniture in order maximize functionality and take up a minimal amount of space. The final design will be a single piece of furniture that
can perform three different functions through changing its shape.
PHASE 1. IDEATION
7 - 14”x17” pages of at least 30 ideation sketches
It may help to start out by writing and sketching about the pieces of furniture you use most often and potential connections between functionality and furniture. Imagine a day in someone’s life and how they may transition between different tasks or furniture modes.
What would be the most interesting combination of functions?
What would be an interesting type of furniture to work with?
What would be interesting shapes?
In how many different ways can the furniture transform?
Do research. Find out what already exists in the area you are developing. Are there any pieces of furniture you want to use as style references or inspiration?
Print out images and paste them into your ideation sketches.
Draw your ideas in a medium that you feel comfortable with and that is easy for others to see from a distance.
PHASE 2. RAPID VISUALIZATION SKETCHES
5 pages (minimum), 14x17" bond
Take your favorite furniture concept (decide on the three functions you want to incorporate into one piece of furniture) and figure out all the potential ways it could be designed. How could it change from one mode to the other? What would make it easy for the user? How could you design it to take up less space, or fit into a room more efficiently? How could it be more exciting or visually interesting? Is the design useful?
By the time you are done with this exercise, you should be able to know what the top, front and side views look like as well as various perspective views and views showing the transformation process.
Make notes, use pen with three line weights and simple grayscale value shading.
You should have a minimum of five 14”x17” pages documenting this process.
PART 3. PRESENTATION RENDERING
2 pages (minimum) on 14”x17” marker paper to present your concept in a final rendering.
Be sure to show your furniture concept in its three different modes.
Also consider your use of color, identity, call-outs, info-graphics, and various angles to explain how
your idea works.
TUTORIALS & HOW-TO GUIDES
GRADING AND EVALUATION RUBRIC
The following Rubric will apply in assessment of the student's work product, presentation, and/or process:

^
* Estimate only. See instructor and calendar for specific due dates. Summer Session schedule is more compressed with one week equal to approximately two and half semester weeks.
CSULB | COTA | DEPARTMENT OF DESIGN | BIO

Questions, feedback, suggestions?
Email me with your recommendations.
©2020 Michael LaForte / Studio LaForte, All Rights Reserved. This site and all work shown here is purely for educational purposes only. Where ever possible student work has been used or original works by Michael LaForte.
Works by professionals found online or in publication are used as instructional aids in student understanding and growth and is credited everywhere possible.