DESN 255 — INTRO TO COMPUTER GRAPHICS I | FALL 2020 | TTH 1:00–3:45PM | ONLINE (AMI)
PRODUCT DESIGN RENDERING IN PHOTOSHOP
SIMPLE
TUTORIALS & HOW-TO GUIDES
COMPLEX
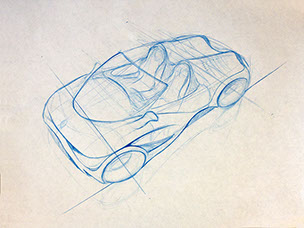

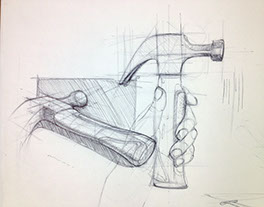
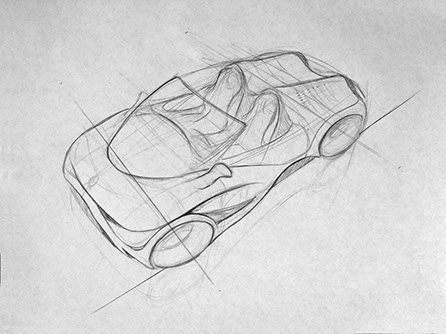
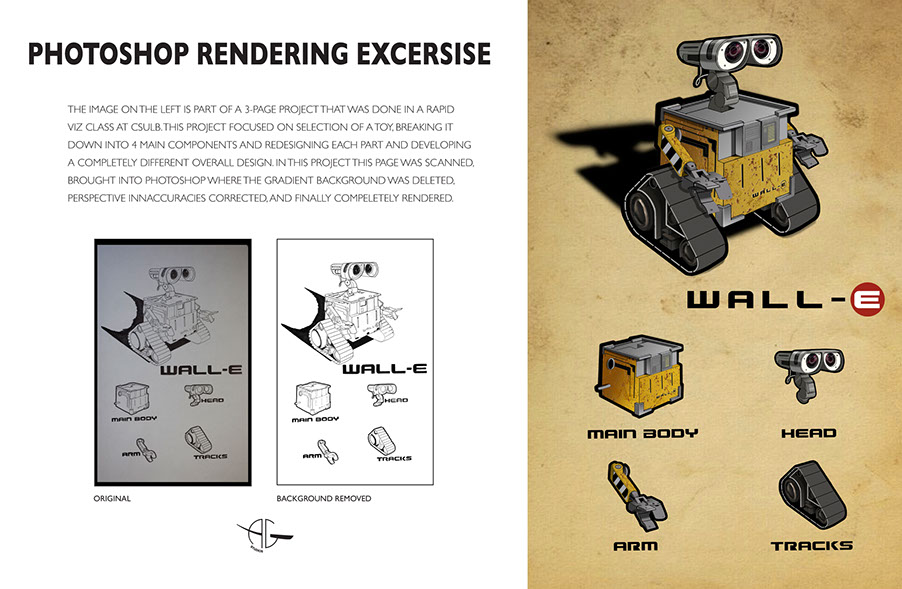
GETTING STARTED: THE DRAWING
This original sketch was done quickly with an indigo blue pencil on bond, nothing fancy and photographed with an iPhone. For a higher resolution and better lighting control, use a scanner. If you use a camera phone, be sure you're capturing in very even, balanced lighting for the best possible original. Unjless you have advanced Photoshop skills, poor and low-resolution photos will be "garbage". The industry expression is "garbage equals garbage out", so give yourself all the advantages you can.
STEP 2: CLEAN AND PREPARE THE DRAWING
In this rendering I didn't plan to go with a cool blue overall look as I wanted something more neutral, so the blue was striped out by using Image > Desaturate and then Levels to make the background white and the line work stronger black. This will allow the sketch to overlay well at the top of the layer stacking order using the Layer Blending Mode, Multiply.
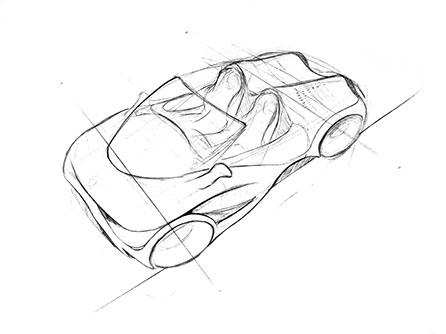
It is this drawing or sketch "layer" you will want to live on top of your other working layers. Again, Layer Multiply Blending mode with make white go clear and black lines will darken over anything under it.
STEP 3: "BUILD" YOUR RENDERING USING LAYERS!
While there are designers, such as Feng Zhao (FZD School) who paint using just one layer for their concept images, most of us will want to work with layers which allow us to build up the image.
Layer Management - Group Your Layers
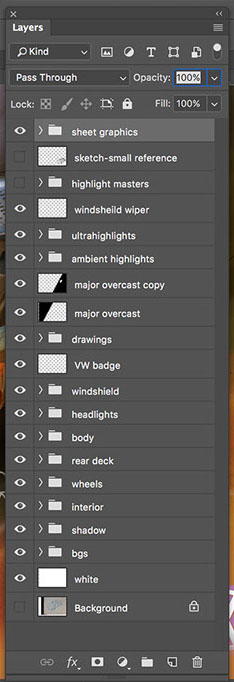
Hold Shift key or CMD key and select the layers you want to group, then select the little folder icon at the bottom of the palette. Be sure to change the name of the group from Group 1 to something more meaningful.
A few Layer Groups from this rendering. I use abbreviations as much as possible, such as BG or BGS for Backgrounds, below left.
Create sub-groups, groups within groups,
as well if needed. It's your image, do what you need to to help you be productive.
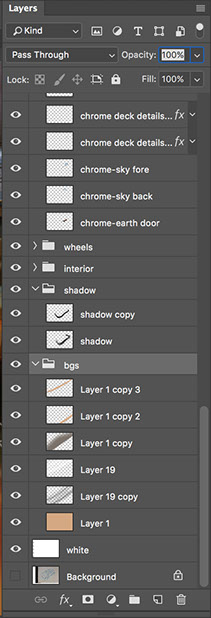
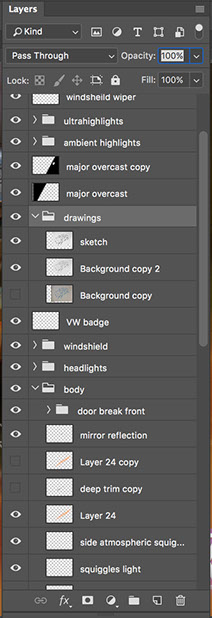
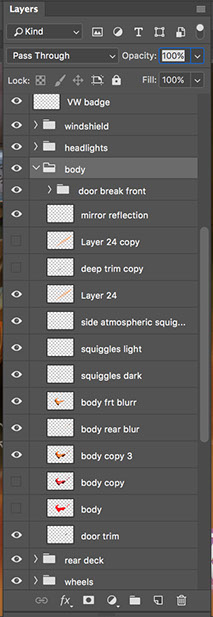
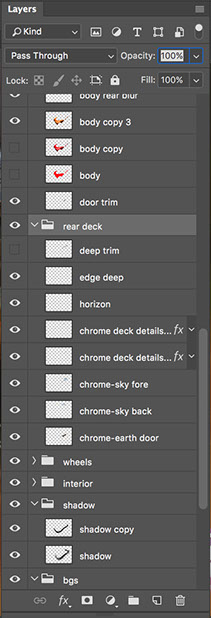
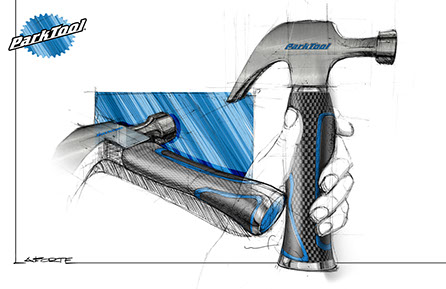
The final rendering (below) has many layers and layer groups to help manage and organize the layers. Begin by blocking out main surfaces and areas and then slowly apply value changes to express core shade values and highlights. Finish by pushing materials, glare, reflections, fine high light details, and atmospheric behaviors to keep it rich and dynamic.
I often capitalize on artifacts left over from erasing and painting and use them elsewhere in the rendering, creating more life and dimension throughout the rendering.
Layer Blending Modes. Explore the various options and the effect they have. While I use a few quite a lot, many others can create some really great unexpected results. Play around. You may discover opportunities that look great and you didn't previously envision.
STEP 4: FINISHING
Step back and see what looks flat and needs more development. Maybe the forms still need more highlight development and core shade values, or three-plane contrast logic. Maybe it need more shadow development.
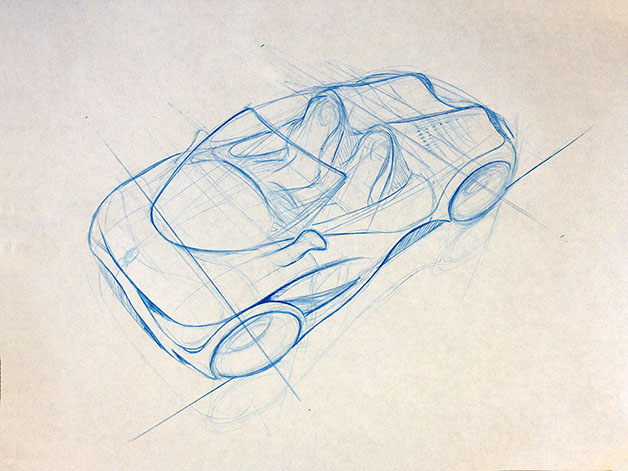
Always consider your focal point. Backgrounds maybe be helpful to place it in a context, maybe you want to paint your own background. Or, consider an abstraction that is out of focus, like this example. Allow distant landscape and objects to be a little softer and out of focus, and desaturate colors for atmospheric perspective.
In a concept sketch, I like to keep the original drawing or sketch layer visible, but softened by reducing the opacity to 60-70%. Seeing the original sketch softens the digital work, making it feel more alive and human.

STUDENT EXAMPLES
DOWNLOADS
Students (transfers, international students, major changers, etc.) who for one reason or another do not have any product design sketches of their own, you may choose to download one of my sketches and work on it, though it is highly preferred that you work on your own design work.
Drawing by Chris Sagui. You MUST credit Chris with the original sketch on your final rendering.

^
* Estimate only. See instructor and calendar for specific due dates. Summer Session schedule is more compressed with one week equal to approximately two and half semester weeks.
CSULB | COTA | DEPARTMENT OF DESIGN | BIO

Questions, feedback, suggestions?
Email me with your recommendations.
©2020 Michael LaForte / Studio LaForte, All Rights Reserved. This site and all work shown here is purely for educational purposes only. Where ever possible student work has been used or original works by Michael LaForte.
Works by professionals found online or in publication are used as instructional aids in student understanding and growth and is credited everywhere possible.