DESN 255 — INTRO TO COMPUTER GRAPHICS I | FALL 2020 | TTH 1:00–3:45PM | ONLINE (AMI)
PHOTOSHOP—SKETCH TO RENDERING
OVERVIEW
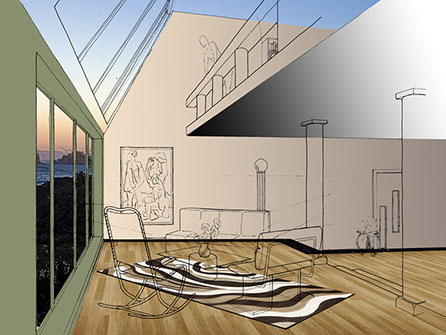
Using Photoshop, transform an original drawing or sketch into a fully rendered object or space, based on and for your case study client. This should complement the content previously produced using Illustrator.
You may use the drawing I provided, or use one of your own which is preferred. Using your own work makes a stronger statement in your professional portfolio and provides you with a greater sense of ownership in the project.
You may use sampled materials you find on the web but also pull from your own photo library for details, people, plants, landscapes, etc.
You should also have values and elements that you "paint" original as well.
Your Goal. Make it AMAZINGLY real. Make your rendering look better than even Studio Max (don't even get me started on Sketchup renderings...) would've rendered. How? Try make everything feel natural, not too crisp and sterile, like it looks like it came off the computer. Think about light sources, multiple usually with a dominant and subordinate sources, and the shadows; cool light casts and warm casts; consider reflections and reflective surfaces; transparency values; etc.
As you're working, from time-to-time, save a JPG of your scene. Follow this tutorial for using the Save for Web option under the File Menu. This is a capture of your image progress and development. It will be revealing to you, and others to see what you changed as your scene progressed. You will need these in Part 2, so save them to a folder that'll be easy to locate later; maybe call the folder "Process" or something similar. You should have at least 10-20 to choose from by the time you're done. Again, you will use them in the second part.
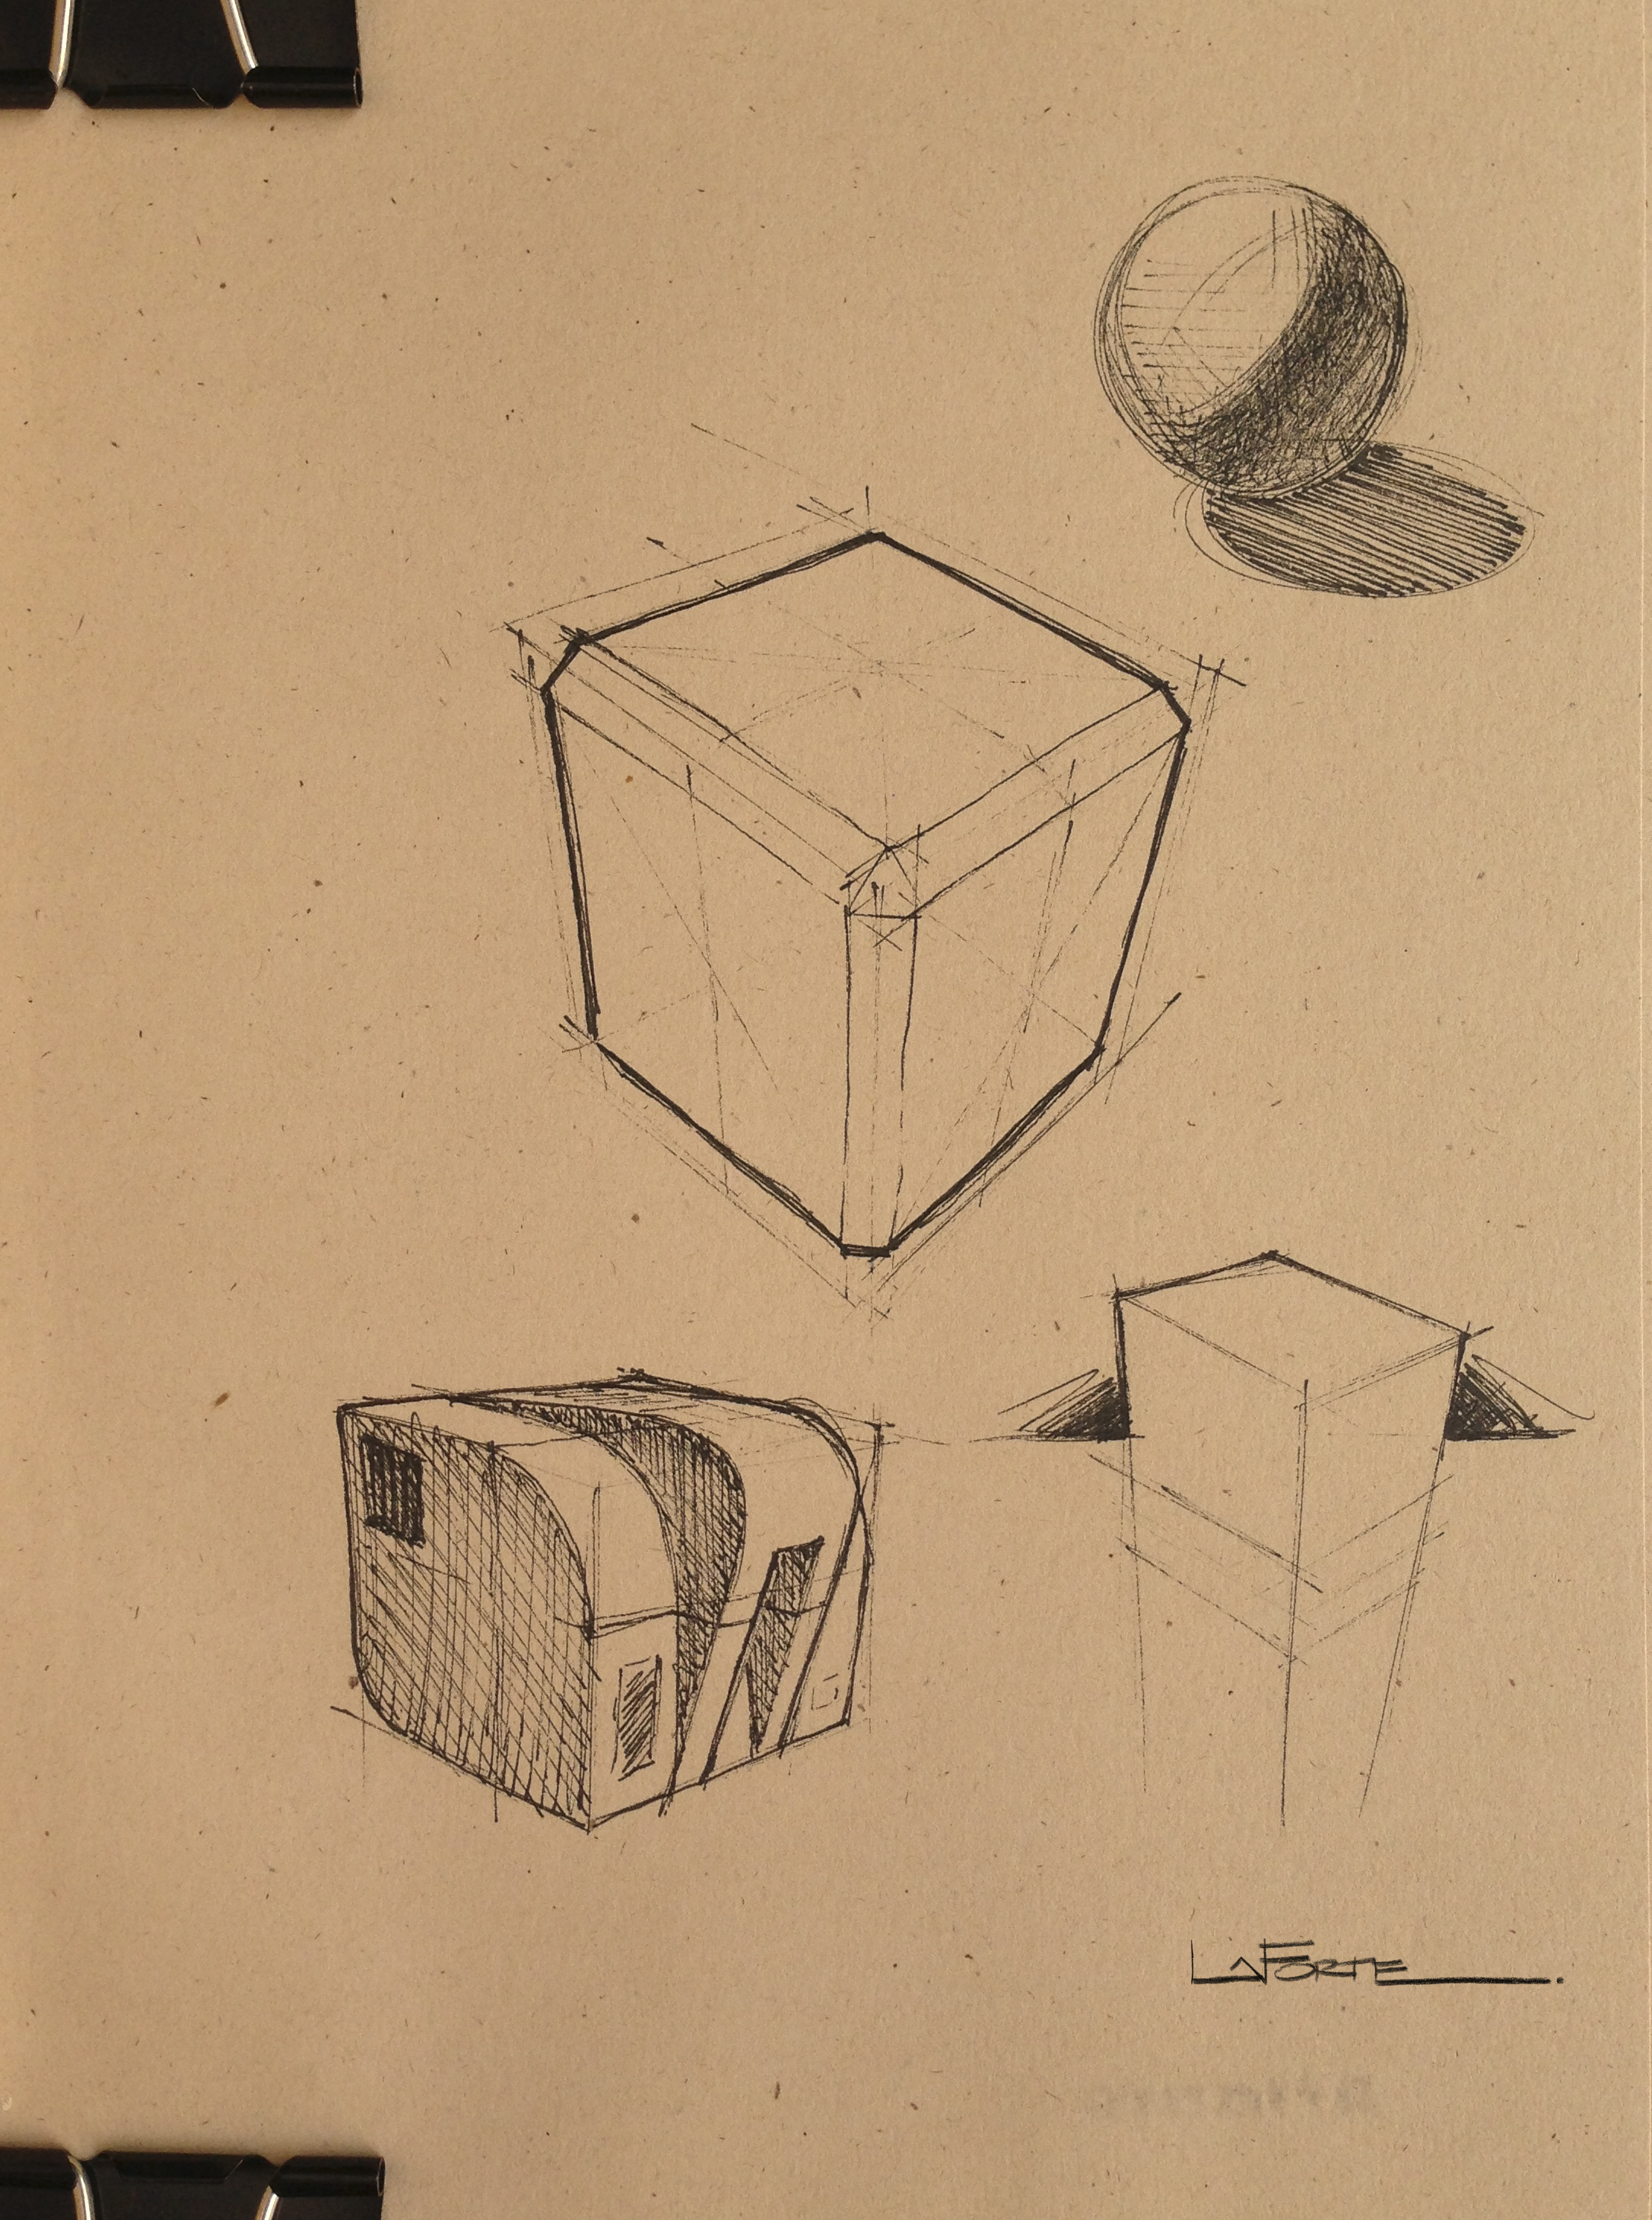
If you have not learned about light-logic do your best, and consult with me for help.
See the page on Shadow Casting for a fundamentals review.
The stronger your knowledge of perspective and light logic, the richer your image should be.
Yes, this is an intermediate to advanced level project, but you will learn a tremendous amount. Students before you have succeeded, and you will too, and you'll be amazed at night and day difference of your start to finish image.
In doing this project, you will learn a great deal about Photoshop and especially how to use layers effectively.
If you need extra help, buy some books. I've listed a number of them on the syllabus. They all cover the same material, it's simply a matter of how you think about the process and apply the tools. Books are INFINITELY easier to use than smart phone apps or even sitting through Youtube videos.
NOTE!!!! Your original sketch/drawing MUST remain visible in the final image. You will need to decide what looks best for your scene. 100% Opacity? May be too strong? 30%, maybe too light? You decide, but it MUST be Visible still.
REFERENCES
Introduction to Imaging: Issues in Constructing an Image Database [online book]. Besser, Howard and Jenniver Trant. 1995.
The Getty Art History Information Program
DELIVERABLES
A JPEG of your FINAL fully Rendered scene. No print required yet--that'll be in Part 2.
Submit your JPEG image to your folder in the class folder on Dropbox.com (not Beachboard's dropbox).
Name your file(s) using the following convention:
PSD-1-Rendered (store, office, lobby, restaurant, etc) Interior-FINAL-YourLastname.jpg, or
PSD-1-Rendered (drill, coffee maker, etc.) Object-FINAL-YourLastname.jpg
Where the blank is, insert a descriptive name for your space or object such as "Luxury Loft", or "Cordless Drill", or a location like "Venice", etc.
Incorrectly named files will result in a grade reduction. Ask me if you have questions.
METHODS AND APPROACH
Let's get started with a relatively simple exercise.
EXERCISE 1
1. Desaturate, strip color out
2. Levels, black—white
8:00 - Transform (Cmd/Ctrl + T), (Distort, right click to bring up submenu)
14:30 - Hues & Saturation (Cmd/Crtl + U)
12:30 - FAILS. DO NOT DO THIS
Follow this video. Submit your image to get approval to
Compositing
You REALLY need to know your rules of perspective
GO BIG!
Upon approval of your completion of the above Exercise, apply what you've learned to a comprehensive rendering of an interior/architecture space (interiors students), OR a complex rendering for industrial designers.
CHOOSE A DIRECTION BELOW
 IA STUDENTSINTERIOR DESIGNER'S PROCESS GUIDEID STUDENTSINDUSTRIAL DESIGNER'S PROCESS GUIDE
TUTORIALS & HOW-TO GUIDES
PHOTOSHOP 1
- Import image
- Image Size / Canvas Size
- Resolution
- Crop / Perspective Crop
- Clone Stamp Retouching
- Level Adjustments
- Unsharp Mask
(if necessary) - Adding Text / Signature
- Transform > Scale
- Saving as JPG for print
PHOTOSHOP 2
- Color Modes and “Desaturation”
- Layers
- Layer Blending Options
- Painting / Coloring
- Lasso Selections
- Magic Wand Selections
- Color Adjust w/Hues
& Saturation - Quick highlights / core-shading
PHOTOSHOP 3
- Color Modes and “Desaturation”
- Layers
- Layer Blending Options
- Painting / Coloring
- Lasso Selections
- Magic Wand Selections
- Color Adjust w/Hues & Saturation
- Quick highlights / core-shading
PHOTOSHOP 4
- Applying Patterns
- Creating Custom Tiles
- Transform > Mirror Flip (symmetry in top views)
- Transform > Warp & Distort
- Trees & People
STUDENT
LEARNING
OUTCOMES
- Ability to transform a traditional sketch or drawing to a fully rendered scene or object.
- Students will gain saturated exposure to some of Photoshop's most fundamental tools.
- Students will build on their understanding of light-logic fundamentals.
EVALUATION
RUBRIC
The Syllabus Rubric will apply in assessment of the student's work product, presentation, and/or process.
^
* Estimate only. See instructor and calendar for specific due dates. Summer Session schedule is more compressed with one week equal to approximately two and half semester weeks.
CSULB | COTA | DEPARTMENT OF DESIGN | BIO

Questions, feedback, suggestions?
Email me with your recommendations.
©2020 Michael LaForte / Studio LaForte, All Rights Reserved. This site and all work shown here is purely for educational purposes only. Where ever possible student work has been used or original works by Michael LaForte.
Works by professionals found online or in publication are used as instructional aids in student understanding and growth and is credited everywhere possible.